How to Overwinter New Zealand laurel
1
New Zealand laurel is intolerant of freezing temperatures; anything below 0°C (32°F) may harm it.
2
During winter, water infrequently to avoid root decay.
3
Provide sufficient indoor humidity to replicate the plant's natural habitat.
Why is New Zealand laurel Susceptible to Frost?
Why is New Zealand laurel Susceptible to Frost?
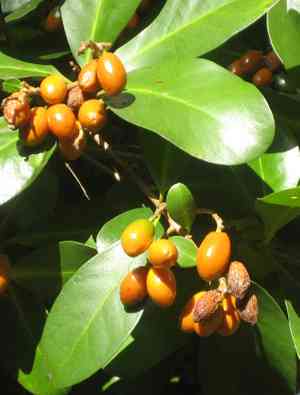
New Zealand laurel (Corynocarpus laevigatus) is a versatile plant prized for its lush foliage and simple maintenance. Despite its resilience in mild climates, this plant is frost-tender and cannot endure freezing temperatures. Its tropical origins make it sensitive to cold, and exposure to frost can harm its leaves, stems, and even roots. If you wish for your New Zealand laurel to flourish through winter, understanding its requirements and providing suitable conditions is vital.
Understanding the Ideal Climate for New Zealand laurel
Native Environment and Temperature Preferences
New Zealand laurel originates from the subtropical and tropical regions of New Zealand, where it enjoys warm, temperate climates. It thrives in temperatures between 15°C and 25°C (59°F and 77°F). While it can endure light frosts, prolonged exposure to temperatures below 0°C (32°F) can cause significant harm. To maintain your plant's health, mimic these conditions as closely as possible, especially during the colder months.
Signs of Cold Stress in New Zealand laurel
Identifying early indicators of cold stress can prevent potential damage to your New Zealand laurel. Look for symptoms such as wilting, yellowing leaves, and blackened or browned leaf edges. These signs suggest the plant is struggling with low temperatures. If you notice any of these, immediate action is necessary to protect your plant from further harm.
How to Prepare New Zealand laurel for Winter
Pruning and Cleaning Up
Before the arrival of cold weather, give your New Zealand laurel a thorough trim. Remove any dead or damaged leaves and branches to lessen the risk of disease and pests. This practice not only promotes better air circulation but also helps the plant conserve energy during the colder period. Always use sharp, clean shears for precise cuts and to avoid harming the plant.
Repotting and Soil Preparation
Consider transplanting your New Zealand laurel into a slightly larger container with fresh, well-draining soil. This ensures the roots have ample space and nutrients to sustain the plant through winter. A mixture of potting soil with added perlite or sand works well to maintain proper drainage and prevent waterlogging, which can be harmful during the colder months.
Watering and Feeding Adjustments
As temperatures decrease, your New Zealand laurel will require less water. Overwatering during winter can lead to root rot, a common issue for many houseplants. Water sparingly and only when the top 2.5 cm (1 inch) of soil feels dry. Additionally, reduce fertilization during this period as the plant's growth rate slows. Excessive fertilization can cause salt accumulation in the soil, which is detrimental to the plant.
Indoor Winter Care for New Zealand laurel
Choosing the Right Indoor Spot
Selecting the ideal indoor location for your New Zealand laurel is crucial. Position the plant in a room where it can receive abundant indirect sunlight. A south-facing window is perfect, but be wary of cold drafts from nearby doors or windows. Consistent temperature and light exposure will help your plant adapt better to its indoor environment.
Maintaining Humidity Levels
New Zealand laurel thrives in high humidity, similar to its natural habitat. Dry indoor air, common during winter, can stress the plant. Use a humidifier or place a tray of water near the plant to boost humidity levels. Regular misting can also help maintain the moisture the plant needs to flourish.
Monitoring Light Conditions
While New Zealand laurel needs plenty of light, it should be shielded from direct sunlight, which can scorch its leaves. During winter, when natural light is limited, you might need to supplement with artificial grow lights. Ensure the plant receives about 6-8 hours of light daily to mimic its natural growing conditions.
Common Problems During Overwintering New Zealand laurel
Pests and Diseases Management
Indoor environments can sometimes encourage pests like spider mites and aphids. Regularly inspect your New Zealand laurel for any signs of infestation. Use insecticidal soap or neem oil to address any issues promptly. Additionally, good air circulation and proper watering practices can prevent fungal diseases that thrive in damp conditions.
Handling Leaf Drop
It's normal for New Zealand laurel to shed some leaves during the winter months as it adjusts to indoor conditions. However, excessive leaf drop can indicate stress from insufficient light or humidity. Adjust the plant's environment as needed, ensuring it receives proper care and attention to minimize leaf loss.
Addressing Yellowing Leaves
Yellowing leaves can signal several problems, including overwatering, poor lighting, or nutrient deficiencies. Monitor your watering schedule and ensure the plant isn't sitting in waterlogged soil. If light levels are low, consider using grow lights to supplement natural light. A balanced, diluted fertilizer can help correct any nutrient imbalances.
When and How to Move New Zealand laurel Outdoors Again
Checking for Last Frost Dates
Before relocating your New Zealand laurel back outdoors, ensure the risk of frost has passed. Check local frost dates and wait until nighttime temperatures consistently remain above 10°C (50°F). This precaution will safeguard your plant from potential cold damage.
Gradual Reintroduction to Outdoor Conditions
Abruptly moving your New Zealand laurel from indoor to outdoor conditions can shock the plant. Gradually acclimate it by placing it outside for a few hours each day, increasing the duration over one to two weeks. This transition helps the plant adjust to the new environment without undue stress.
Post-Winter Pruning and Care
Once your New Zealand laurel is back outdoors, it may require some post-winter attention. Prune any damaged or dead branches to encourage new growth. Resume a regular watering and feeding schedule, adjusting as needed based on the plant's response.


