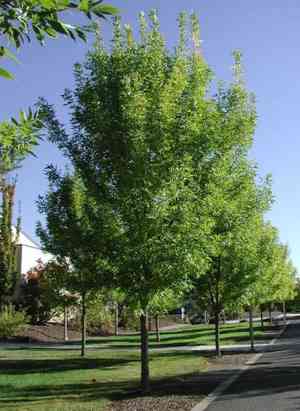
How to Propagate Green ash?
Fraxinus pennsylvanica can be multiplied via dormant wood cuttings, air layering, and planting seeds during the fall and winter seasons. The ease of propagation differs based on the technique employed. Indicators of successful multiplication involve the development of roots and fresh shoots. Essential advice for propagation encompasses utilizing a rooting stimulant and ensuring the growing medium remains damp.
Optimal Time for Green Ash Propagation
Propagation Type
Cutting
Propagation Season
Autumn,Winter
Tools for Green Ash Propagation
Pruning shears
Sharp, clean pruning shears are vital for taking green ash cuttings. Precise cuts minimize damage to both parent and cutting, boosting rooting success. Disinfect tools beforehand to prevent disease spread.
Rooting hormone
Rooting hormone, in powder or gel form, encourages root development on green ash cuttings. This product enhances the likelihood of successful rooting, especially for hardwood cuttings from green ash.
Propagation tray
A shallow tray with drainage holes is used to hold the growing medium. It supports the cutting upright, providing consistent moisture and space for root growth.
Growing medium
A sterile, well-draining growing medium, like a peat and perlite blend, promotes good aeration and moisture retention, crucial for green ash root development.
Humidity dome or plastic bag
To maintain high humidity around green ash cuttings, preventing dehydration before root establishment, use a humidity dome or clear plastic bag. Proper humidity is key for green ash cutting survival.
Heat mat (optional)
For green ash, a heat mat can be useful in cooler conditions. It gently warms the soil, encouraging root growth by providing a consistent, suitable temperature.
Misting bottle
A misting bottle is essential to keep the medium and green ash cuttings moist, but not saturated. Misting prevents drying out, a common cause of propagation failure.
Post-Propagation Care for Green Ash
How to Care for Your Newly Propagated Green Ash?
After green ash roots establish, provide consistent moisture without waterlogging, as green ash prefers moist, well-drained soil. Place the young plant in full to partial sunlight. As green ash grows, prune for shape and remove damaged branches. Regularly check for pests or diseases and apply a balanced fertilizer during the growing season for healthy development.
Common Errors to Avoid When Propagating Green Ash
Overwatering
Excessive watering of green ash cuttings can lead to rot and fungal issues, decreasing the chances of successful root formation.
Deep planting
Burying green ash cuttings or seeds too deeply can impede growth by restricting air exchange and making shoot emergence difficult.
Neglecting aftercare
Insufficient aftercare, such as failing to maintain proper humidity and temperature, can result in poor root establishment and cuttings that do not thrive.
Using diseased material
Propagating green ash with diseased or pest-infested plant material can spread pathogens or pests to new plants, compromising their health.
Ignoring cleanliness
Not sanitizing tools or containers can introduce pathogens to green ash cuttings or seeds, leading to infections that hinder propagation success.
Tips for Propagating Green Ash
Healthy stock
Choose disease-free, vigorous green ash cuttings for propagation, ensuring the source plant is healthy to boost success rates.
Correct moisture level
Maintain consistent moisture without waterlogging the soil to encourage healthy green ash root growth while preventing rot.
Soil quality
Use a well-draining, sterile growing medium for green ash propagation to provide adequate airflow and moisture balance for root development.
Rooting hormone
Applying rooting hormone to green ash cuttings can stimulate root production and increase the likelihood of successful propagation.
Environmental control
Ensure a stable propagation environment for green ash with appropriate humidity and indirect light, optimizing conditions for cuttings or seedlings to establish.


