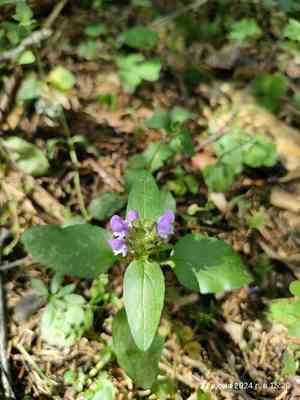
How to Propagate Common selfheal?
The primary method for propagating common selfheal involves taking cuttings during the warmer periods of spring and summer. This procedure is quite straightforward; the emergence of new foliage signifies successful propagation. Consistent irrigation and a growing medium that drains effectively are crucial for achieving the best outcomes.
When Is the Optimal Time to Propagate Common Selfheal?
Propagation Method
Cutting
Propagation Period
Spring, Summer
What Equipment Is Used in Common Selfheal Propagation?
Sharp Pruning Shears
These are vital for obtaining clean, precise cuttings from common selfheal. A clean cut helps prevent disease and promotes successful rooting.
Rooting Hormone Powder or Gel
This substance encourages root formation and can boost the success rate of common selfheal cuttings.
Sterile Potting Mix
A soilless blend reduces the risk of soil-borne pathogens affecting common selfheal cuttings, while ensuring proper drainage and aeration.
Small Planting Pots or Trays
Containers are necessary for planting the cuttings. An appropriate size ensures the cutting isn't overwhelmed by soil volume and moisture.
Plastic Bags or Domes
These create a mini-greenhouse effect around the cutting to maintain humidity, which is crucial for common selfheal cuttings to prevent drying out.
Watering Can with a Fine Rose
Ensures gentle watering of common selfheal cuttings, preventing disturbance of delicate new roots and over-saturation of the medium.
Labels or Markers
For identifying common selfheal cuttings, noting the propagation date, and tracking rooting progress.
How to Propagate Common Selfheal?
Propagation Method
Cutting
Difficulty Level
Easy
How to Care for Your Newly Propagated Common Selfheal?
How to Care for Your Newly Propagated Common Selfheal?
After propagation, gradually acclimate common selfheal to outdoor conditions if they were started indoors. Maintain consistent moisture levels without overwatering, and avoid fertilizer until well established. Choose a location with full sun to partial shade and well-drained soil. Once planted outdoors, common selfheal are resilient and require minimal upkeep. They should be watered during extended dry periods and can be divided every few years to revitalize growth.
Common Mistakes to Avoid When Propagating Common Selfheal
Overwatering
Excessive watering can lead to root rot in common selfheal, a condition that hinders root development and impairs the plant's ability to absorb nutrients.
Too much sun
Common selfheal prefers partial shade, and exposing young cuttings or seedlings to direct, intense sunlight can scorch delicate leaves, causing stress and reduced survival rates.
Neglecting soil type
Common selfheal thrives in well-draining soil, and using an unsuitable soil type can result in waterlogging and impede root development.
Deep planting
Seeds or cuttings planted too deeply may struggle to emerge or root properly, as common selfheal requires adequate depth for sufficient light exposure and air circulation.
Ignoring pests
Failing to inspect propagated materials for pests can introduce infestations that compromise the growth and health of common selfheal.
Tips For Propagating Common Selfheal
Adequate moisture balance
Maintain a consistent moisture level in the soil without overwatering to provide the optimal environment for common selfheal root development.
Partial shade location
Place common selfheal in a location with partial shade to protect it from harsh sunlight while providing enough light for healthy growth.
Appropriate soil mix
Use a well-draining soil mix rich in organic matter to promote vigorous root growth and prevent waterlogging for common selfheal.
Shallow planting
Plant common selfheal seeds or cuttings at a shallow depth to ensure they receive enough light and air for successful germination and rooting.
Pest monitoring
Regularly inspect common selfheal for signs of pests and take immediate action if any are detected to prevent infestations that could damage the plant.


