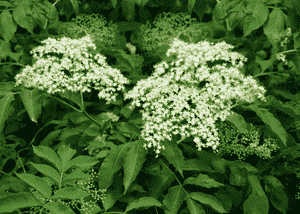
How to Propagate American elder?
The most suitable period for propagating American elder is in the fall and winter, utilizing methods such as cuttings and layering. This plant presents a moderate challenge for propagation, with indicators of success being the emergence of new shoots and foliage. Sufficient hydration and abundant light are essential throughout this procedure.
Optimal Time for American Elder Propagation
Propagation Method
Cutting
Propagation Period
Autumn,Winter
Tools for American Elder Propagation
Sharp Pruning Shears
These are crucial for making clean cuts from american elder, minimizing harm to the parent plant and ensuring a healthy start for the cuttings. Sharp blades reduce disease risk and tissue damage.
Rooting Hormone
A rooting hormone aids in the development of roots in american elder cuttings. This boosts the likelihood of successful rooting, leading to stronger establishment when transferred to a growing medium.
Sterile Potting Mix
A sterile potting mix offers a clean, pathogen-free environment for american elder cuttings to establish roots. Such a medium prevents the introduction of diseases that could harm the cuttings' growth and survival.
Propagation Trays or Containers
These hold the sterile potting mix and american elder cuttings in a stable environment, allowing for proper moisture and temperature control essential for root development.
Plastic Domes or Covers
They create a miniature greenhouse effect over the american elder cuttings, maintaining high humidity and consistent temperature, vital for wound healing and stimulating root growth.
Heating Mats
These mats gently warm the soil, replicating the temperature conditions american elder cuttings prefer for optimal root establishment, especially useful during cooler seasons or climates.
Misting System (Optional)
A misting system can provide continuous moisture to american elder cuttings, preventing them from drying out. Adequate humidity is key for cuttings to develop roots without excessive transpiration.
Caring for Newly Propagated American Elder
Caring for Newly Propagated American Elder
After successful propagation, gradually introduce the rooted american elder cutting to outdoor conditions if it was started indoors. Once roots are established and new growth appears, move it to a larger pot or a permanent garden spot. American elder thrives in full sun to partial shade with moist, well-drained soil. Consistent watering is important, especially during dry periods. Prune annually in late winter to encourage new growth and maintain shape. Apply a balanced fertilizer in early spring for vigorous growth.
Common Errors to Avoid When Propagating American Elder
Overwatering
Saturated soil can cause root rot and fungal issues, jeopardizing american elder's propagation.
Neglecting to sterilize equipment
Using unclean tools can introduce pathogens, impeding american elder's growth.
Ignoring pest control
Pests can harm new shoots and cuttings, hindering american elder's establishment.
Planting depth inconsistency
Incorrect planting depths can lead to poor root development, affecting american elder's survival.
Overlooking humidity needs
Low humidity levels can dry out cuttings before they root, negatively impacting american elder's propagation success.
Tips For Propagating American Elder
Use healthy parent plants
Choosing disease-free, robust stock ensures strong cuttings for american elder's propagation.
Careful cutting selection
Selecting the right stem sections improves rooting chances and the health of new american elder plants.
Appropriate substrate choice
Using a well-draining, nutrient-rich medium supports american elder's root development.
Maintaining optimal hydration
Providing consistent moisture encourages rooting without overwhelming american elder cuttings.
Regular observation
Monitoring american elder cuttings allows for timely intervention to address any propagation issues.


