How to Prune Black alder?
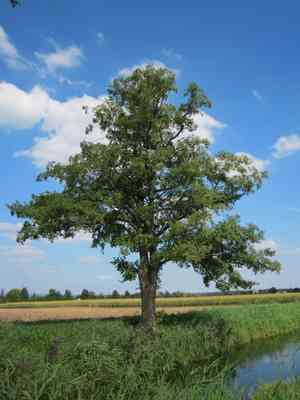
A deciduous tree recognized for its adhesive buds and catkins, black alder flourishes in moist environments. Perform pruning from late winter to early spring to control its form and eliminate dead or ailing branches, fostering adequate air movement. Reduce older stalks to stimulate renewed growth. Pruning once leaves have dropped offers an unobstructed view of the plant's framework. Consistent pruning sustains health and vigor, reducing the likelihood of illness and improving the tree's visual attractiveness.
What Are the Benefits of Pruning Black Alder?
What Are the Benefits of Pruning Black Alder?
Trimming black alder promotes its development, fostering a more vigorous and thriving tree. By selectively removing limbs, black alder maintains an attractive form and prevents congestion, which can impede its vitality and shape.
What Is the Best Time for Pruning Black Alder?
What Is the Best Time for Pruning Black Alder?
These periods are considered ideal for trimming black alder because in late winter, the plant remains dormant, minimizing stress and sap loss. This timing encourages robust growth as temperatures rise. Early spring pruning, prior to bud break, allows black alder to recover from cuts without diverting energy from new growth. It ensures a healthier response, avoids disrupting flowering or fruiting cycles, and helps prevent diseases and pests that are more active in warmer conditions.
What Tools Do I Need to Prune Black Alder?
Hand Pruners
Essential for making clean cuts on branches and twigs of black alder up to approximately 3/4 inch in diameter. Opt for bypass pruners over anvil types for a cleaner cut that promotes better healing.
Lopping Shears
Perfect for cutting through larger branches of black alder that measure between 3/4 inch and 2 inches in diameter. Long handles provide leverage, simplifying the cutting of tough wood.
Pruning Saw
Required for removing branches exceeding 2 inches in diameter. A curved blade saw is recommended for its effectiveness in cutting thicker branches of black alder.
Hedge Shears
Useful for shaping and maintaining the form of black alder if it is being cultivated as a hedge or for ornamental purposes. Delivers a straight cut for multiple stems simultaneously.
Pole Pruner
Crucial for reaching higher branches of black alder without needing a ladder. Look for a pole pruner equipped with both a saw and a lopper attachment for versatility.
Gloves
Safety gear to protect hands from scratches and cuts while trimming black alder. Ensure gloves are durable and fit properly.
Safety Glasses
Protective eyewear to shield eyes from flying debris and sawdust generated during the pruning of black alder.
How to Prune Black Alder
Step1: Timing for Pruning
Determine the optimal time to prune black alder, which is in late winter or early spring before new growth commences. This timing reduces disease risk and facilitates better wound healing.
Step2: Tool Sterilization
Begin by sanitizing your pruning tools using a 10% bleach solution or rubbing alcohol to prevent the spread of pathogens.
Step3: Removing Dead Wood
Start by eliminating dead wood. Identify dead branches by observing a lack of buds or leaves and checking for brittle or easily snapped twigs. Cut dead branches back to the point of healthy wood, just above a live bud or branching point. Ensure clean cuts using sharp tools to avoid tearing the bark.
Step4: Pruning Diseased Limbs
Next, identify and trim diseased limbs. Look for unusual growths, discolored bark, or foliage symptoms. Prune these limbs well back into healthy tissue, at least several inches below the affected areas. Dispose of diseased material away from healthy black alder to prevent contamination.
Step5: Trimming Low Hanging Branches
Address low hanging branches that obstruct movement under the canopy or interfere with foot traffic, structures, or sightlines. Cut these branches back to their origin point or to a lateral branch that is at least one-third the diameter of the limb being removed. Ensure cuts are clean and do not leave stubs, which can lead to decay.
Step6: Shaping the Plant
After significant cuts, shape the black alder to maintain a balanced, natural-looking form, keeping in mind not to remove more than a quarter of the crown at once as it can stress the tree.
Step7: Cleanup of Trimmings
Once pruning is complete, clear all trimmed materials from around the black alder to avoid attracting pests. Chipped wood can be used as mulch if it's healthy.
Step8: Aftercare and Monitoring
Post-pruning care involves monitoring the trimmed black alder for signs of stress or disease and providing adequate water and nutrients to support recovery and new growth.
Post-Pruning Care for Black Alder
Post-Pruning Care for Black Alder
Immediately after trimming black alder, ensure it's thoroughly watered to alleviate stress. The pruned black alder should receive balanced light, avoiding extreme sun exposure. Maintain ambient humidity and stable temperatures conducive to recovery. Apply a balanced fertilizer to aid in healing and growth. Regularly inspect black alder for signs of distress or infection, such as discolored leaves or wilting. If symptoms are present, respond with appropriate horticultural treatments, such as fungicides or insecticides, and adjust care as necessary.
Common Pruning Mistakes with Black Alder
Over-pruning
Trimming too much at once, which can stress black alder and potentially lead to poor health or reduced growth.
Improper Cutting Technique
Making incorrect cuts that damage the bark and create potential entry points for disease and pests.
Ignoring Natural Shape
Removing branches without considering the natural shape of black alder, resulting in an unbalanced or weakened structure.
Not Sterilizing Tools
Neglecting to sanitize pruning tools between cuts, especially when trimming diseased branches, risking the spread of infection to healthy parts of black alder.
Leaving Dead Wood
Failing to remove dead or damaged wood which can attract pests and diseases, negatively affecting the overall health of black alder.
Common Pruning Tips for Black Alder
Clean, Sharp Cuts
Use clean, sharp pruning tools to make precise cuts on black alder that heal quickly and minimize the risk of disease.
Selective Thinning for Light and Air
When thinning branches, selectively remove interior or crossing limbs to ensure adequate light penetration and air circulation for black alder.
Preserving Structural Integrity
Maintain the structural integrity of black alder by identifying and preserving the central leader and well-spaced lateral branches.
Angled Cuts for Proper Healing
Make cuts at a slight angle, away from the bud or main trunk, to promote proper healing and direct new growth in the desired direction for black alder.
Pruning for Aesthetics and Health
Consider the overall aesthetics and natural form of black alder when pruning, to enhance its appearance while still encouraging healthy growth and development.


