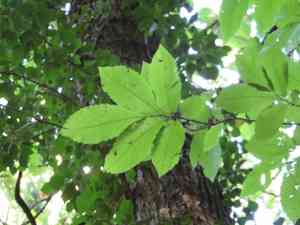
How to Prune Sweet chestnut?
Prized for its palatable nuts and robust wood, Castanea sativa flourishes with appropriate attention. For Castanea sativa, early structural pruning establishes its form; thereafter, yearly upkeep eliminates deceased or ailing branches. Perform pruning in late winter or early spring to encourage robust development. Refrain from extensive cutting, as Castanea sativa tends to exude sap. Trimming enhances air movement and light exposure, which assists in nut yield and overall tree vitality.
What Are the Benefits of Pruning Sweet Chestnut?
What Are the Benefits of Pruning Sweet Chestnut?
Trimming sweet chestnut promotes robust development and helps maintain its desired form. Regular trimming ensures the tree stays healthy and fruitful, optimizing its growth conditions.
What Is the Best Time for Pruning Sweet Chestnut?
What Is the Best Time for Pruning Sweet Chestnut?
Trimming sweet chestnut from late winter to early spring is beneficial for several reasons. This period occurs just before the start of the new growth cycle when the plant is still inactive. Pruning at this time reduces stress as the plant is not actively directing resources into growth, flowering, or fruiting. The risks of disease transmission and sap loss are also minimized during dormancy. Additionally, the absence of leaves provides better visibility for making precise cuts and allows the gardener to shape the plant effectively in preparation for the growing season. By timing pruning before the new spring growth, healing is quicker once growth begins, and the plant can channel its energy into the development of strong, healthy shoots. This period aligns with the plant's natural cycle and encourages vigorous growth and productivity in the subsequent months.
What Tools Do I Need to Prune Sweet Chestnut?
Hand Pruners
Perfect for trimming smaller branches and twigs on sweet chestnut. They enable accurate cuts, which is crucial for the plant's health and shaping. Suitable for branches up to 3/4 inch in diameter.
Lopping Shears
Ideal for cutting through thicker branches of sweet chestnut that hand pruners cannot manage, typically up to 2 inches in diameter. They feature long handles that provide leverage and reach.
Pruning Saw
Essential for removing larger branches from sweet chestnut. A saw with a curved blade can be particularly effective for cutting through branches over 2 inches in diameter.
Pole Pruner
Useful for reaching higher branches without needing a ladder. For sweet chestnut, this can help maintain the shape and health of the canopy.
How to Prune Sweet Chestnut
Step1: Timing for Pruning
Ensure the optimal time to prune sweet chestnut. Pruning should occur from late winter to early spring, avoiding the coldest periods to prevent tree damage and to bypass the spring sap flow which can cause 'bleeding' wounds.
Step2: Pruning Tool Preparation
Prepare the necessary tools for pruning sweet chestnut. Tools should include sharp, clean, and appropriately sized pruning saws and loppers. Disinfecting tools between cuts can prevent disease spread.
Step3: Dead Wood Identification and Removal
Identify dead wood by looking for branches lacking leaves and flexibility. Cut dead wood back to living tissue, making a clean cut just outside the branch collar to promote proper healing.
Step4: Damaged Limb Pruning
Locate any damaged limbs on sweet chestnut, which might be broken, split, or showing signs of disease or pest infestation. Prune these limbs off cleanly, above the point of damage but well below any diseased tissue.
Step5: Canopy Thinning for Airflow and Light
Thin out crowded shoots to ensure ample airflow and light penetration through the canopy of sweet chestnut. Remove interior growth that crosses other branches or grows inward toward the tree's center.
Step6: Proper Technique for Shoot Thinning
When thinning crowded shoots of sweet chestnut, make your cuts at the point of origin or to a lateral branch that is at least one-third the diameter of the branch being removed. This encourages healthy regrowth and prevents weak spots.
Step7: Inspecting and Correcting Cuts
After cutting, examine the pruning cuts for smoothness as ragged cuts on sweet chestnut may lead to improper healing. If necessary, make additional slight corrective cuts to smooth out the edges.
Step8: Post-Pruning Cleanup
Clean up the area around sweet chestnut after pruning by removing all cut limbs, branches, and debris to reduce the chances for pests and diseases to breed.
Step9: Post-Pruning Tree Health Monitoring
Monitor sweet chestnut after pruning for signs of disease or pests around the trimmed areas, ensuring the tree's good health and catching potential issues early.
Step10: Pruning Tool Maintenance
Maintain your tools after finishing pruning sweet chestnut. Cleaning, sharpening, and oiling your tools will keep them ready for the next pruning session and prolong their lifespan.
Post-Pruning Care for Sweet Chestnut
Post-Pruning Care for Sweet Chestnut
Immediately after pruning sweet chestnut, apply a wound sealant to cuts to prevent disease entry. Ensure sweet chestnut has balanced light exposure; partial shade helps reduce stress. Maintain moderate humidity and avoid temperature extremes. Post-pruning, sweet chestnut requires enhanced nutrient uptake—apply a balanced fertilizer to support new growth. Regularly inspect sweet chestnut for signs of stress—wilting or discoloration—and pests or infections, acting promptly with appropriate treatments. Consistent monitoring and gentle care will promote vigorous recovery and health.
Common Pruning Mistakes with Sweet Chestnut
Over-Pruning in One Session
Trimming too much in a single session, which can stress sweet chestnut and lead to poor health or reduced yield.
Improper Cuts Near Main Trunk
Making cuts too close to the main trunk, removing the branch collar or causing unnecessary wounds that can introduce disease.
Using Blunt or Dirty Pruning Tools
Using dull or unclean pruning tools, which can tear the bark and increase the risk of infection for sweet chestnut.
Leaving Long Stub on Branches
Leaving too long a stub when removing branches, which can prevent proper healing and attract pests and diseases.
Pruning without Clear Objective
Pruning without a clear goal, such as removing dead wood, shaping for structure, or controlling size, which can result in an unbalanced or unproductive sweet chestnut.
Common Pruning Tips for Sweet Chestnut
Sanitize Tools to Prevent Disease
Disinfect pruning tools before and after use to minimize the risk of spreading pathogens to sweet chestnut.
Make Angled Cuts Away from Buds
Make clean cuts at a slight angle away from the bud, ensuring that water does not collect on the cut surface and that the bud is positioned to grow in the desired direction.
Thin Crowded Areas for Light and Air
Thin out crowded areas to allow light and air to penetrate the center of sweet chestnut, which encourages healthy growth and reduces disease pressure.
Preserve Branch Collar During Cuts
Retain the branch collar when cutting larger branches to promote quick and proper healing over of the wounds.
Cut to Outward-Facing Bud or Branch
When shortening a branch, cut back to a lateral branch or bud that is facing the outside of the canopy, which encourages outward growth and maintains the natural shape of sweet chestnut.
Remove Diseased or Dead Limbs Promptly
Remove diseased, dead, or damaged limbs promptly to maintain the vitality of sweet chestnut, focusing on the overall health and integrity of the tree.


