How to Prune Greater celandine?
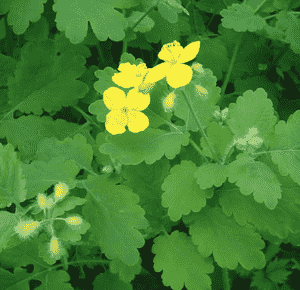
A persistent herbaceous plant featuring prominent yellow blossoms and a milky fluid, greater celandine thrives with trimming to foster a more compact form. Pinch back the terminals of juvenile plants in early spring to stimulate branching. Routinely remove faded blooms in late summer to inhibit self-propagation. Cutting just above leaf junctions encourages fresh sprouts. Always employ sanitized, keen implements to lessen trauma and avert pathogen dissemination. Trimming improves the plant's aesthetic and manages its proliferation in cultivated areas.
Advantages of Trimming Greater Celandine
Advantages of Trimming Greater Celandine
By trimming greater celandine, gardeners can encourage more robust development and maintain a desired form, preventing excessive growth and fostering a neater, more controlled look. This improves the plant's health and visual appeal.
Optimal Time for Trimming Greater Celandine
Optimal Time for Trimming Greater Celandine
Trimming greater celandine in early spring is beneficial as it marks the start of the plant's growth cycle, allowing for rapid recovery and energy redirection towards new growth. This period precedes sap flow, meaning cuts will heal faster and the plant is less susceptible to diseases. Late summer trimming coincides with the end of the flowering phase. This timing helps prevent greater celandine from becoming overly leggy and promotes healthier foliage. It also avoids the risk of late-season growth that could be harmed by early frost, ensuring the plant's vitality and resilience for the subsequent year.
Tools Required for Trimming Greater Celandine
Hand Pruners
Perfect for cutting small stems and precise snips. Greater celandine typically doesn't need heavy-duty pruning, so sharp bypass hand pruners will suffice for making clean cuts without harming plant tissues.
Gardening Gloves
Protection for the gardenerâs hands. Greater celandine contains irritating sap, so wearing gloves is crucial to shield the skin during trimming.
Pruning Shears
Effective for shaping and managing growth. Since greater celandine can spread quickly, pruning shears are useful for reducing the plant's size.
Garden Scissors
Suitable for deadheading and minor trimming. Greater celandine can benefit from removing old or yellowed leaves, and precise garden scissors can assist in this delicate task.
How to Trim Greater Celandine
Step1: Wearing Protective Gloves
Wear protective gloves before beginning to trim greater celandine to prevent skin irritation from its sap, which can be harmful if it contacts skin or eyes.
Step2: Deadheading Spent Flowers
Start by deadheading spent flowers. Snip the flower stems just above a leaf set or a branching point to encourage more blooms and to prevent seed formation if you wish to control greater celandine's spread.
Step3: Removing Diseased Foliage
Identify diseased or yellowing foliage on greater celandine. Use sanitized pruning shears to snip affected leaves at the stem's base to promote better air circulation and reduce disease spread.
Step4: Trimming Overgrown Stems
Locate overgrown stems of greater celandine that are impacting the plant's shape or health. Trim these stems back to a healthy set of leaves or a lateral branch to maintain the desired form and encourage bushier growth.
Step5: Shaping the Plant
Assess the overall shape of greater celandine after removing unwanted parts. Make any final shaping cuts to create a balanced, natural-looking form, being careful not to remove more than one-third of the plantâs total growth.
Step6: Sanitizing Pruning Shears
Clean the pruning shears with alcohol or a bleach solution (1 part bleach to 9 parts water) after trimming greater celandine to prevent disease transmission to other plants.
Step7: Disposing of Trimming Debris
Properly dispose of removed material from greater celandine, especially diseased foliage, to prevent pathogen spread in the garden. Do not compost if disease signs are present.
Step8: Watering Post-Trimming
Water greater celandine sufficiently after trimming to aid recovery and reduce stress. Ensure well-drained soil, as greater celandine does not tolerate waterlogged conditions.
Step9: Monitoring Plant Health
Monitor greater celandine for signs of new growth and health issues following trimming. Trim as needed throughout the growing season, typically late winter to early spring, but perform maintenance trimming anytime if necessary.
Post-Trimming Care for Greater Celandine
Post-Trimming Care for Greater Celandine
Immediately after trimming, greater celandine needs adequate watering to lessen stress. Adjust environmental factors, ensuring sufficient indirect light, stable temperatures, and increased humidity for recovery. Apply a balanced fertilizer to replenish nutrients. Watch for wilting, discoloration, or signs of infection in the trimmed areas. If symptoms appear, adjust care or consult an expert for potential treatments, safeguarding greater celandine's health and growth.
Common Trimming Errors with Greater Celandine
Trimming at Incorrect Life Stage
Trimming greater celandine at the wrong developmental stage can lead to poor plant health or fewer blooms the following year.
Using Dull or Dirty Tools
Using dull or unclean trimming tools can damage greater celandine stems and potentially introduce disease to the plant.
Excessive Trimming Limits Photosynthesis
Over-trimming can stress greater celandine, as removing too much foliage can hinder the plant's ability to photosynthesize and store energy.
Ignoring Dead or Diseased Limbs
Neglecting to remove dead or diseased parts of greater celandine, which could lead to further disease spread or pest infestations.
Improper Cutting Techniques
Cutting greater celandine stems at incorrect angles or too close to the main stem, which can impede healing and promote fungal infection.
Disregarding Natural Plant Shape
Failing to consider the natural growth habit and shape of greater celandine when trimming, which could result in an unnatural appearance and reduced vigor.
General Trimming Advice for Greater Celandine
Sharp, Clean Tools for Healthy Cuts
Use sharp, clean pruning shears to make precise cuts on greater celandine, which promotes quick healing and reduces disease risk.
Trimming for Natural Shape and Health
Trim greater celandine to maintain its natural form, removing only dead, diseased, or overcrowded stems to encourage air circulation and healthy new growth.
Correct Trimming Cuts Above Nodes
When trimming, cut just above a set of leaves or a node, leaving about a quarter-inch (0.5 cm) to prevent damage to the emerging bud on greater celandine.
Thinning Dense Centers for Light Penetration
Thin out the center of greater celandine if it becomes too dense, to improve light penetration and air circulation within the plant.
Seasonal Dead Material Removal
Regularly check greater celandine for dead or diseased material, and trim as necessary throughout the growing season to keep the plant healthy.
Support Structures for Large Plants
For large or sprawling specimens of greater celandine, consider providing support structures to maintain their shape after trimming.


