How to Prune Black ash?
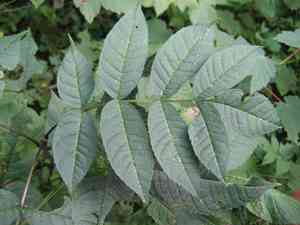
A wetland-dwelling deciduous tree, the black ash is primarily identified by its considerable height and composite foliage. To ensure peak development and well-being, trimming should be performed in late winter or early spring, while the tree is inactive. Essential methods involve excising dead or ailing limbs and reducing crowded sections to enhance airflow. Thoughtful shaping bolsters structural soundness. Trimming provides advantages such as stimulating fresh growth, preserving the tree's shape, and lowering the risk of illness.
What Are the Benefits of Pruning Black Ash?
What Are the Benefits of Pruning Black Ash?
Trimming black ash encourages robust growth and maintains its desired form. By eliminating dead or diseased limbs, black ash can direct energy towards developing a strong framework and healthy foliage, crucial for its longevity and visual appeal.
What Is the Best Time for Pruning Black Ash?
What Is the Best Time for Pruning Black Ash?
Late winter and early spring are considered ideal for trimming black ash due to several factors related to the plant's growth cycle and well-being. During late winter, the plant remains dormant, which lessens the risk of stress or disease transmission that can occur during active growth periods. Pruning before the spring bud break ensures the plant can recover quickly without diverting energy from new growth. Additionally, pruning during these seasons helps maintain the plant's desired shape and size, removes any dead or damaged wood, and promotes more vigorous growth in the subsequent season.
What Tools Do I Need to Prune Black Ash?
Bypass Pruners
Perfect for making clean cuts on young or slender branches of black ash. Their sharp, scissor-like blades offer precision, which benefits the health of black ash.
Loppers
Suitable for cutting thicker, mature branches of black ash, where bypass pruners might not be enough. The long handles provide leverage and reach, minimizing the effort needed for pruning black ash.
Pruning Saw
Essential for removing larger limbs that loppers cannot handle. The serrated edge is designed for cutting through the tough wood of mature black ash branches with greater control and efficiency.
Pole Pruner
Useful for reaching higher branches without using a ladder. It includes a pruning saw and a bypass cutting tool, allowing for versatile cutting options for different parts of black ash.
Hedge Shears
Effective for shaping and controlling the growth of black ash when cultivated as a hedge or for removing multiple small twigs and branches simultaneously.
Pruning Gloves
Protection is vital, and gloves will shield hands from scrapes and cuts while pruning black ash.
How to Prune Black Ash
Step1: Inspecting and Identifying Unhealthy Branches
Examine black ash for any dead wood, diseased limbs, and damaged branches that require removal. This should be done during the dormant season, typically late winter or early spring, to avoid attracting pests and encouraging disease.
Step2: Disinfecting Pruning Tools
Sanitize your pruning tools with a solution of one part bleach to nine parts water or use rubbing alcohol to prevent spreading disease from infected parts of the black ash to healthy ones.
Step3: Pruning Dead Wood
Identify dead wood by looking for branches that lack any green buds in the spring or that have a brittle, dry appearance. Cut dead wood back to the point where it meets healthy, living tissue using sharp pruning shears, making a clean angled cut just above a bud or branch.
Step4: Removing Diseased Limbs
Locate diseased limbs by checking for an unusual color, texture, or the presence of fungus. Make cuts at least a few inches into the healthy tissue below the diseased area to ensure all parts of the infection are removed.
Step5: Cutting Damaged Branches
Examine black ash for damaged branches, which may have been caused by storms, animals, or human activity. These branches are typically broken, split, or otherwise physically harmed. Prune damaged branches back to the nearest lateral branch or the main trunk, if necessary, at a 45-degree angle just above a bud facing the outside of the tree to encourage outward growth.
Step6: Shaping the Plant
After removing dead, diseased, or damaged parts, shape the black ash if needed. However, black ash bears a natural shape that generally requires minimal pruning for aesthetics. Any shaping should maintain the structural integrity and natural form of the tree.
Step7: Debris Cleanup
Remove any resulting debris and fallen leaves from around the black ash to discourage pests and fungal growth. Dispose of or burn the pruned material, especially if it is diseased, to prevent the spread of any pathogens.
Step8: Post-Pruning Care
Water black ash deeply after pruning to support its recovery, and apply a layer of mulch around the base of the tree to help retain moisture and regulate soil temperature. Avoid piling mulch against the trunk as this can promote rot.
Step9: Monitoring Pruned Areas
Monitor the pruned areas over time to ensure they are healing correctly and that no further signs of disease or damage occur. Additional corrective pruning may be necessary if there is any reoccurrence of dead, diseased, or damaged growth.
Post-Pruning Care for Black Ash
Post-Pruning Care for Black Ash
Immediately after trimming black ash, ensure ample water supply to lessen transplant shock. Adjust environmental conditions to provide dappled sunlight, maintaining high humidity and moderate temperature, which are vital for recovery. Apply a balanced, slow-release fertilizer to replenish nutrients and support new growth. Monitor black ash for wilted leaves or sap oozing, indicating stress or infection, and treat promptly with appropriate fungicides. Implement consistent checks for pests and diseases, further safeguarding black ash's regeneration.
Common Pruning Mistakes with Black Ash
Over-pruning Weakens Plant Structure
Excessive pruning can leave black ash susceptible to diseases and weaken its structure. Removing more than 25-30% of the foliage in a single season is too much.
Improper Branch Cutting Damages Tree
Cutting branches flush with the trunk can harm the bark and the branch collar, slowing down the healing process and potentially leading to infections.
Unsterilized Tools Spread Diseases
Failing to sterilize pruning tools between cuts, especially when moving between different black ash plants, can spread diseases.
Incorrect Cuts Lead to Water Accumulation
Making cuts that are either too slanted or too straight can prevent water from properly draining, potentially leading to rot or disease.
Overlooking Weak Branch Unions
Ignoring weak, narrow-angled, or V-shaped branch unions, which are more prone to breaking and should be prioritized for removal.
Common Pruning Tips for Black Ash
Precise Cuts with Sharp Tools
Use sharp, clean tools to make precise cuts. This helps to prevent damage to black ash and promote quicker healing.
Prioritize Removing Dead or Damaged Limbs
Focus on removing dead, damaged, or diseased branches first to maintain the health and aesthetics of black ash.
Properly Cut Near Branch Collar
Cut just beyond the branch collar without leaving a stub, as this allows black ash to heal more efficiently and protect against pathogens.
Selective Thinning Improves Plant Health
When thinning is necessary, selectively remove smaller branches to improve light penetration and air flow, which can help reduce the likelihood of disease.
Maintain Main Structure with Selective Pruning
Retain the main structure and form of black ash by pruning selectively and avoiding the removal of large, well-established branches unless they pose a risk or are unviable.


