How to Prune Common winterberry?
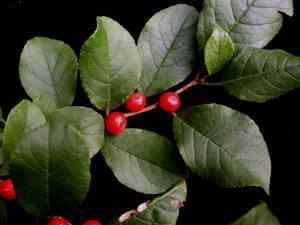
This deciduous holly, recognized for its vibrant crimson berries and lustrous green foliage, flourishes with judicious trimming. For typical winterberry, the most effective pruning strategy involves reducing older branches to stimulate fresh development and fruit yield. Perform pruning in early spring prior to the emergence of new shoots. Concentrate on excising deceased or ailing wood and sculpting the plant. Advantages encompass improved light penetration and air movement, fostering the plant's general well-being and robustness.
Advantages of Trimming Common Winterberry
Advantages of Trimming Common Winterberry
Trimming common winterberry promotes robust development by eliminating old or lifeless wood, fostering new, healthy shoots. Pruning helps maintain its desired form and size, ensuring an attractive, compact look.
Optimal Period for Pruning Common Winterberry
Optimal Period for Pruning Common Winterberry
Pruning common winterberry in early spring is ideal because it occurs after the danger of severe cold that could harm fresh cuts but before the growth cycle begins when energy reserves are directed towards development. This timing allows for the removal of any dead or damaged branches that may have occurred during winter without disrupting the plant's natural flowering or fruiting process. Pruning at this time also provides common winterberry the entire growing season to recover and produce new growth, resulting in a strong structure and improved display in the subsequent season. Furthermore, since common winterberry is a deciduous shrub that produces fruit on new wood, early spring trimming ensures that the upcoming season's growth is not compromised, encouraging abundant berry production which typically happens in late summer to fall.
Required Tools for Pruning Common Winterberry
Hand Pruners
Essential for making clean cuts on common winterberry's smaller branches, especially when shaping or removing deadwood.
Loppers
Perfect for reaching into common winterberry's denser areas and cutting through thicker branches that hand pruners cannot manage, minimizing plant damage.
Pruning Saw
Needed for common winterberry when dealing with branches over 1.5 inches thick that loppers can't handle, to prevent bark tearing.
Hedge Shears
Useful for trimming common winterberry if it's grown as a hedge. Precise shears help maintain shape and encourage bushier growth.
Gloves
Protects hands from common winterberry's potentially sharp twigs and from the elements during the pruning process.
How to Prune Common Winterberry
Step1: Structural Assessment During Dormancy
Evaluate common winterberry for pruning requirements during its dormant phase in late winter or early spring. At this time, the plant's structure is more visible without leaves obstructing the view.
Step2: Tool Sterilization
Sanitize your pruning tools with a solution of 1 part bleach to 9 parts water to prevent the spread of disease.
Step3: Dead Wood Removal
Begin by removing any dead wood. Look for branches that are brittle, lack buds, or are discolored. Make cuts just above the healthy wood at a 45-degree angle using clean, sharp bypass pruners or loppers, depending on branch size.
Step4: Diseased Branch Pruning
Identify diseased branches by signs of discoloration, unusual growths, or changes in texture. Prune these branches back to healthy tissue or to the base if necessary. Ensure the cut is clean and avoid tearing the bark.
Step5: Sucker Growth Eradication
Locate suckers, which are vigorous vertical shoots growing from the base of common winterberry or from the roots. Remove these as close to the main stem or root as possible to prevent regrowth, using a pruning saw for thicker growths.
Step6: Interior Thinning for Air and Light
After removing dead, diseased, and sucker growth, step back to assess common winterberry for overall shape and structure. Thin out crowded areas by removing some of the interior branches to improve air circulation and light penetration.
Step7: Selective Shaping and Contouring
If shaping of common winterberry is required, do so by selectively pruning branches to maintain a natural, balanced form. Avoid shearing, which can lead to a dense outer layer of growth that stifles the interior of the plant.
Step8: Post-Pruning Cleanup
Clean up all debris from pruning to prevent any disease from spreading and to keep the area tidy. Dispose of diseased material properly, away from other plants and compost.
Step9: Tip Pruning for Bushier Growth
Prune the tips of common winterberry's branches if necessary to encourage bushier growth or to maintain size, making cuts just above a set of leaves or a branch junction.
Step10: Mulching to Protect Roots
Finish by applying a layer of mulch around the base of common winterberry, being careful not to pile it against the stems, to maintain soil moisture and protect the roots.
Post-Pruning Care for Common Winterberry
Post-Pruning Care for Common Winterberry
Immediately after pruning common winterberry, water thoroughly to minimize stress and promote healing. Maintain consistently moist soil, avoiding waterlogging. Provide dappled sunlight; too much direct sun can stress the recovering plant. Keep common winterberry in a stable environment with moderate temperatures to prevent shock. Apply a balanced, slow-release fertilizer to support new growth. Regularly inspect for wilting, discoloration, or signs of infection. If symptoms appear, assess and adjust care or consult an expert. Prune any diseased or dead material promptly to prevent spread.
Common Pruning Mistakes with Common Winterberry
Over-pruning stresses and stunts growth
Pruning too much at once, which can stress common winterberry and hinder future growth.
Dull or dirty tools damage stems and spread disease
Using dull or unclean pruning tools, which can damage the stems of common winterberry and introduce disease.
Excessive lower branch removal causes leggy growth
Removing too many of the lower branches, which can result in a leggy appearance and reduce the overall ornamental value of common winterberry.
Pruning without purpose risks unnatural shape and lost blooms
Pruning without a clear purpose, leading to an unnatural shape or the accidental removal of buds that would have bloomed.
Cuts too near main stem slow healing and risk infection
Making cuts too close to the main stem, which can create larger wounds that are slow to heal and prone to infection.
Common Pruning Tips for Common Winterberry
Angle cuts for outward growth and avoid bud damage
When making cuts, do so at a 45-degree angle about 1/4 inch above an outward-facing bud to promote outward growth of common winterberry.
Remove dead or diseased branches to maintain plant health
Focus on removing any dead, damaged, or diseased branches first to maintain the health and appearance of common winterberry.
Sterilize pruning tools to prevent disease spread
Regularly sterilize pruning tools with a solution of bleach and water to prevent the spread of disease among common winterberry plants.
Thin crowded branches for better air flow and growth
Thin out crowded branches to improve air circulation and light penetration, which can help prevent disease and encourage more vigorous growth of common winterberry.
Prune for natural shape and avoid reducing blooms
When shaping common winterberry, aim to maintain a natural growth habit, and avoid over-pruning which can reduce flowering and berry production.


