How to Prune Wild privet?
This partially evergreen shrub, frequently employed in hedges, necessitates consistent trimming to preserve its form and vitality. For wild privet, the ideal approach involves cutting back after blooming to stimulate fresh development and sculpt the hedge. The most suitable periods are early spring or winter when the plant is dormant, to minimize strain. Pruning not only boosts visual attractiveness but also improves air movement and deters illness. Refrain from severe cutting into mature wood, as it might not regenerate robustly.
What Are the Benefits of Pruning Wild Privet?
What Are the Benefits of Pruning Wild Privet?
Trimming wild privet promotes abundant blooms and strong vitality by eliminating old growth, thereby reducing pest and disease issues. It helps maintain a compact form, improving garden aesthetics.
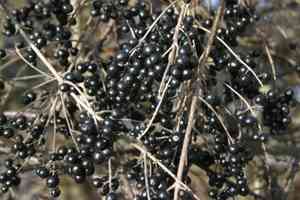
What Is the Best Time for Pruning Wild Privet?
What Is the Best Time for Pruning Wild Privet?
Pruning in early spring is optimal as it coincides with wild privet's dormant phase, enabling the plant to channel energy into recovery and new development as the growing season begins. Furthermore, without leaves, the plant's structure is more visible, allowing for more precise cuts. Winter pruning, while the plant is still inactive, minimizes stress and the risk of disease or pests exploiting fresh wounds. It's crucial to avoid pruning wild privet in late spring or summer, as this can disrupt its flowering cycle and decrease the subsequent season's berry yield.
What Tools Do I Need to Prune Wild Privet?
Hand Pruners
Perfect for precise cutting of small branches and twigs of wild privet. Bypass pruners will ensure clean cuts without crushing plant tissue.
Loppers
Suitable for cutting thicker branches that hand pruners cannot manage, promoting healthy growth after pruning wild privet.
Pruning Saw
Necessary for removing larger branches. Its fine-toothed blade ensures smooth cuts through the mature wood of wild privet.
Hedge Shears
Ideal for shaping and maintaining formal wild privet hedges, providing a straight, even cut across multiple stems.
Pruning Gloves
Protects hands from thorns and rough branches when pruning wild privet, ensuring safety and comfort.
Cleaning Materials
Such as an alcohol or bleach solution to sanitize tools before and after pruning wild privet. This step is vital to prevent disease transmission.
How to Prune Wild Privet
Step1: Determining Optimal Pruning Time
Identify the ideal period to prune wild privet, which is late winter to early spring before new growth emerges. This timing helps ensure the health of wild privet and its vigorous development during the growing season.
Step2: Tool Sanitization
Sanitize all pruning tools with a solution of 1 part bleach to 9 parts water to prevent disease spread. Always clean your tools before and after pruning wild privet.
Step3: Removing Dead Wood
Begin by removing any dead wood. Carefully inspect wild privet for branches that are no longer aliveâthey will lack green buds and be brittle. Cut these branches back to live wood using clean, sharp secateurs, making the cut at a slight angle just above a healthy bud or node.
Step4: Pruning Old Nonproductive Stems
Trim old stems that are no longer producing vigorous growth or have become too woody. On wild privet, this will encourage fresh growth from the base. Cut these stems at or near ground level, being careful not to damage any new shoots that may be emerging.
Step5: Thinning for Air and Light
Thin dense inner branches to improve air circulation and light penetration throughout wild privet. Make selective cuts to remove overlapping or crowded branches by cutting them back to their point of origin or to a lateral branch. This step will stimulate new growth and reduce the risk of disease.
Step6: Shape Maintenance Pruning
Assess the overall shape of wild privet and prune to maintain its natural form. Avoid excessive cutting back that would leave bare patches or unsightly stubs. Aim for a balanced, pleasing shape while keeping the pruning cuts as minimal as possible.
Step7: Disposal of Pruned Material
Dispose of all pruned material away from wild privet to reduce the risk of any potential disease. Compost healthy material and discard any diseased sections appropriately.
Step8: Post-Pruning Watering and Mulching
Water wild privet thoroughly after pruning to help reduce stress and support recovery. Provide mulch around the base of wild privet to retain moisture and regulate soil temperature.
Post-Pruning Care for Wild Privet
Post-Pruning Care for Wild Privet
Immediately after pruning wild privet, water thoroughly to alleviate stress. Manage light exposure, ensuring wild privet receives partial to full sunlight, and maintain moderate humidity and temperature levels to aid healing. Apply a balanced, slow-release fertilizer to replenish nutrients and support regrowth. Monitor wild privet for wilted leaves or cankers as indicators of stress or infection, and if observed, adjust care accordingly. Additionally, ensure the pruned area is clean to prevent disease entry.
Common Pruning Mistakes with Wild Privet
Over-Pruning Weakens Plant Growth
Excessive pruning can harm wild privet, potentially leading to feeble growth and diminishing the plant's natural shape.
Damaged Branches from Dull Tools
Using dull or unclean pruning tools can injure wild privet branches, making them vulnerable to disease and pests.
Incorrect Cutting Harm Growth Points
Cutting too close to the main stem or a bud can eliminate the growth points necessary for healthy new branches and flowers.
Unbalanced Pruning Disrupts Growth Pattern
Pruning haphazardly without understanding wild privet's growth pattern may result in an uneven shape and inconsistent foliage density.
Neglected Removal of Unhealthy Branches
Failing to remove dead, diseased, or damaged branches can impair the plant's overall vitality.
Common Pruning Tips for Wild Privet
Sharp Shears for Clean Cuts at 45 Degrees
Use sharp, clean pruning shears to make precise cuts at a 45-degree angle just above outward-facing buds, which encourages outward growth and better air circulation for wild privet.
Thin Center for Light Penetration and Health
Thin out the center of the plant to allow light and air to penetrate, which promotes healthier growth and reduces the likelihood of disease for wild privet.
Natural Shaping with Varied Cutting Heights
When shaping wild privet, aim to maintain a natural look by cutting back to varying heights to promote a more organic appearance rather than a formal, sheared shape.
Staggered Pruning for Rejuvenation
To rejuvenate an overgrown wild privet, prune older stems back to the ground level over several seasons instead of all at once, which allows for a staggered regeneration while maintaining the plant's health.
Consistent Removal of Suckers for Plant Form
Consistently remove any suckers or wayward branches throughout the growing season to maintain the desired form and direct the plant's energy towards its main structure.


