How to Prune Creeping jenny?
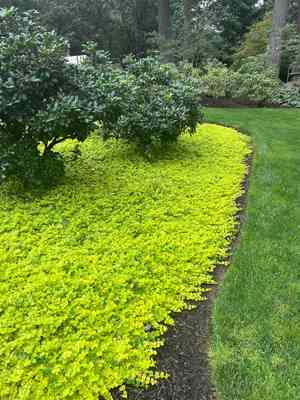
This enduring groundcover features circular, chartreuse leaves and vivid, star-like blossoms. The most effective trimming for creeping jenny entails removing any deceased or discolored foliage and managing its expansion. Perform pruning from early spring through late autumn to foster compact development and preserve its shape. Shorten elongated stems to stimulate a more bushy appearance. Trimming additionally aids in averting decay in excessively thick regions and promotes abundant flowering. Emphasize air movement and light penetration by selectively thinning crowded sections.
What Are the Benefits of Pruning Creeping Jenny?
What Are the Benefits of Pruning Creeping Jenny?
Trimming creeping jenny promotes strong development and helps keep its form, preventing excessive growth and ensuring it doesn't overshadow nearby plants or dominate garden areas.
What Is the Best Time for Pruning Creeping Jenny?
What Is the Best Time for Pruning Creeping Jenny?
Early spring is an ideal time for trimming creeping jenny as it precedes the start of new growth, allowing the plant to direct its energy into producing healthy new leaves and maintaining its shape. Pruning in late fall is also beneficial because the plant's growth slows as it enters dormancy for winter, minimizing stress on creeping jenny and reducing the risk of disease transmission through fresh cuts. These seasons avoid the blooming period, ensuring the plant's display is not negatively impacted.
What Tools Do I Need to Prune Creeping Jenny?
Bypass Pruners
Perfect for making clean cuts on creeping jenny's soft stems, enabling selective removal of individual stems without harming the plant.
Garden Scissors
Useful for trimming and shaping creeping jenny's trailing stems and for precisely cutting back overgrown sections.
Handheld Shears
Effective for cutting back larger areas of creeping jenny more quickly, especially during its active growth period to maintain desired spread and density.
How to Prune Creeping Jenny
Step1: Timing for Pruning
Wait for the appropriate moment to trim creeping jenny, typically in late winter or early spring before new growth begins, to facilitate healthy development and prevent overgrowth.
Step2: Sharpen Pruning Tools
Clean and sharpen your pruning shears or scissors to ensure precise cuts and prevent infection in creeping jenny.
Step3: Locate Overgrown Foliage
Find overgrown foliage of creeping jenny that has extended beyond the desired boundaries of its growing area. Aim to maintain its natural shape while managing its spread.
Step4: Angle Cuts for Growth
Cut the overgrown foliage back to a set of leaves or a branching point, ensuring cuts are made at a 45-degree angle to promote water runoff and prevent disease.
Step5: Identify Damaged Stems
Identify damaged stems on creeping jenny that are broken, discolored, or show signs of disease or pest damage.
Step6: Prune Back to Healthy Tissue
Trim the damaged stems back to a healthy section, ensuring each cut is clean and just above a set of leaves or node to encourage new growth.
Step7: Remove Withered Parts
Inspect creeping jenny for withered parts, including any brown or dry leaves and stems.
Step8: Clear Away Cuttings
Carefully remove the withered parts, cutting back to healthy tissue to improve overall plant vigor and appearance.
Step9: Post-Pruning Watering
After pruning, clear away all cuttings from the base of creeping jenny to prevent disease and discourage pests.
Step10: Thorough Watering for Stress Reduction
Water creeping jenny thoroughly after pruning to reduce stress on the plant and aid in its recovery process.
Post-Pruning Care for Creeping Jenny
Post-Pruning Care for Creeping Jenny
After trimming creeping jenny, water immediately to reduce transplant shock and provide stable moisture. For optimal growth, maintain partial sun exposure, ensuring a balance of light and shade, and a consistent temperature range between 60-75°F with moderate humidity. Apply a balanced, water-soluble fertilizer to replenish nutrients and support robust growth. Vigilantly monitor creeping jenny for wilt, discoloration, or pests, indicative of stress or infection. Should any adverse signs emerge, adjust care accordingly and consider a mild fungicide or insecticide.
Common Pruning Mistakes with Creeping Jenny
Overly Aggressive Pruning of Plant Foliage
Trimming too aggressively, where gardeners remove too much of creeping jenny's foliage at once, potentially stressing the plant.
Using Dull or Dirty Pruning Tools
Using dull or dirty pruning tools, which can harm creeping jenny's stems and introduce diseases to the plant.
Ignoring Dead or Yellowing Foliage
Neglecting to remove dead or yellowing foliage, which can hinder new growth and potentially foster disease development within creeping jenny.
Common Pruning Tips for Creeping Jenny
Prune with Sharp, Clean Shears for Healthy Cuts
Use sharp and clean pruning shears to make clean cuts, which help promote quick healing and minimize stress to creeping jenny.
Maintain Shape and Encourage Growth with Proper Pruning
Trim creeping jenny by pinching or cutting back overgrown stems to maintain the desired shape and to encourage fuller growth.
Remove Dead Leaves Moderately to Boost Health and Airflow
Regularly remove dead or yellowed leaves to improve air circulation and overall plant health, but do so in moderation to avoid over-pruning creeping jenny.


