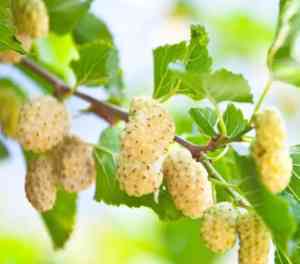
How to Prune Mulberry?
Distinguished by its cordate foliage and yielding nourishing berries, the mulberry tree thrives with particular trimming techniques. Reduction cuts preserve its form and elevate fruit excellence by enhancing light exposure and air movement. Eliminating lifeless or ailing branches and those that intersect improves the tree's well-being. The most opportune time for pruning is in late winter while the tree is inactive, thereby reducing strain and the potential for disease. Consistent trimming of this specimen guarantees harmonious development and plentiful fruit yield.
What Are the Benefits of Pruning Mulberry?
What Are the Benefits of Pruning Mulberry?
Trimming mulberry enhances its yield, encourages robust development, and maintains a desired form. This method fosters healthier, more fruitful branches, ensuring a greater harvest of mulberry's produce.
What Is the Best Time for Pruning Mulberry?
What Is the Best Time for Pruning Mulberry?
Late winter is considered the optimal period for pruning mulberry due to several factors. During this time, the plant is dormant, which minimizes sap loss and stress. Additionally, with leaves shed, the plant's structure is more visible, allowing for precise cuts. Pruning then stimulates new spring growth, can boost fruit production, and helps maintain the plant's shape and size. It also reduces the likelihood of pruning cuts becoming infected, as many pests and diseases are less active in cold weather. Dormant season trimming aligns with mulberry's growth cycle, ensuring strong recovery and vitality for the upcoming growing season.
What Tools Do I Need to Prune Mulberry?
Hand Pruners
Perfect for cutting small branches and twigs on mulberry, these should be bypass-style for clean cuts without crushing plant tissue.
Loppers
Featuring long handles, they offer leverage for cutting medium-thick branches, which mulberry might have, especially when shaping or controlling its size.
Pruning Saw
Essential for larger branches that hand pruners and loppers cannot manage, ensuring clean cuts without harming mulberry's structure.
Pole Pruner
For mulberry's higher branches, use a pole pruner to reach and trim without a ladder, improving safety and efficiency.
Hedge Shears
Useful if mulberry is shaped into a hedge or topiary, hedge shears help maintain a neat, uniform appearance across broad leaf areas.
Pruning Gloves
Crucial for protecting hands from thorns and rough bark when pruning mulberry.
Safety Glasses
To prevent eye injury from flying debris when cutting branches and twigs of mulberry.
Step-by-Step Approach
Identify branches to prune, then use hand pruners for the smallest, loppers for medium, a pruning saw for the largest, and pole pruners for out-of-reach ones. Finish with hedge shears for shaping mulberry hedges. Always use personal protective equipment.
How to Prune Mulberry
Step1: Tool Sanitization
Clean your pruning tools before starting to prevent disease spread. Use a solution of one part bleach to nine parts water for your shears and saws.
Step2: Dead Wood Identification
Identify dead wood on mulberry by looking for branches without leaves, with dark, brittle wood or bark. Dead wood will not flex, unlike live branches.
Step3: Dead Wood Pruning
Prune dead wood by making clean cuts just outside the branch collar to promote proper healing. Avoid leaving stubs, as they can attract pests and disease.
Step4: Sucker Growth Removal
Locate suckers, which are vigorous vertical shoots growing from the base or roots of mulberry. These divert energy from the main tree.
Step5: Removing Suckers Flush to Base
Cut suckers at ground level or as close to the base of mulberry as possible for a flush cut, which reduces the chances of regrowth.
Step6: Diseased Branch Inspection
Inspect mulberry for diseased branches. Signs of disease may include discoloration, cankers, or oozing.
Step7: Diseased Branch Pruning
Prune diseased branches by cutting several inches into healthy wood beyond the affected tissue. Disinfect your tools after each cut to prevent disease spread.
Step8: Damaged Limb Assessment
Look for damaged limbs, which may result from weather events or mechanical injury. Identify limbs that are broken, split, or otherwise structurally compromised.
Step9: Removing Damaged Limbs
Remove damaged limbs by cutting just outside the branch collar to promote healing. Larger limbs may require a three-step cutting method to prevent bark tear: undercut the branch, cut from the top slightly farther out, then remove the stub.
Step10: Shaping and Thinning
Finally, step back and examine the overall shape of mulberry. Remove any remaining branches that disrupt the desired form or that cross and rub against each other, potentially leading to wounds and disease.
Step11: Debris Cleanup
Clean up all pruned material from the ground to prevent any pests or diseases from harboring in the debris.
Step12: Post-Pruning Watering
Water mulberry adequately after pruning to help the tree recover and to encourage healthy growth.
Step13: Post-Pruning Monitoring
Monitor mulberry after pruning for signs of disease or pest problems and address as needed.
Post-Pruning Care for Mulberry
Post-Pruning Care for Mulberry
Immediately after pruning mulberry, water sufficiently to alleviate stress; avoid overwatering. Maintain moderate light exposure, shielding mulberry from intense sunlight. Ensure stable ambient temperature and humidity, mimicking mulberry's preferred growing conditions. Apply a balanced fertilizer to replenish nutrients and encourage healthy regrowth. Regularly check for signs of distress, such as wilting or discoloration. At infection signs, promptly apply appropriate fungicides or bactericides, and remove affected areas to prevent spread.
Common Pruning Mistakes with Mulberry
Over-Pruning Shock
Excessive pruning at once can shock mulberry, potentially leading to stunted growth or reduced fruit production.
Indiscriminate Branch Cutting
Cutting branches randomly without considering mulberry's natural shape can result in a poorly structured tree and weakened branches.
Ignoring Unhealthy Branches
Neglecting dead, diseased, or damaged branches during pruning could lead to spreading diseases or pests, which can be detrimental to mulberry's overall health.
Unsterilized Pruning Tools
Failing to sterilize pruning tools before and after use might introduce or spread disease across mulberry or between different plants.
Improper Cut Placement
Making cuts too close to the trunk or main branches could damage the collar and hinder the plant's natural healing process.
Leaving Branch Stubs
Leaving stubs when removing branches can lead to decay and disease entry points that may affect mulberry's health.
Common Pruning Tips for Mulberry
Use Sharp, Clean Tools
Use sharp, clean pruning tools to make precise cuts, which will help mulberry to heal faster and reduce the risk of disease.
Create Open Canopy Framework
When thinning out mulberry, aim to create an open framework that allows light and air to penetrate the canopy, promoting healthier growth and fruit production.
Prune Above Outward Facing Bud
Prune just above a bud facing the outside of the canopy to direct new growth outwards and maintain the shape of mulberry.
Remove Crossing/Inward Branches
During the pruning of mulberry, make an effort to identify and remove any branches that cross one another or grow inward to prevent future structural issues.
Sealant on Large Wounds
Apply a thin layer of pruning sealant on large wounds to protect mulberry from pests and diseases, though smaller cuts are typically best left untreated to heal naturally.
Three-Cut Technique for Large Branches
When removing larger branches, use the three-cut technique on mulberry to prevent bark stripping: make a notch on the underside of the branch, then cut from the top down a few inches away from the notch, and finally make the final cut just outside the branch collar.


