How to Prune Black poplar?
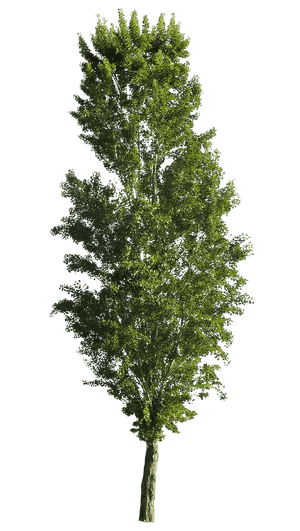
The black poplar, a deciduous tree recognized for its impressive height and extended lifespan, thrives with judicious trimming to preserve its well-being and form. Essential methods involve crown reduction to boost light access and air circulation, alongside the elimination of deceased or ailing limbs. The most effective time for pruning is in late winter or early spring to lessen sap leakage and facilitate recovery. This period coincides with its dormant state, thereby decreasing strain on the black poplar. Pruning boosts vitality and can avert potential harm from gusts or heavy loads.
What Are the Benefits of Pruning Black Poplar?
What Are the Benefits of Pruning Black Poplar?
Trimming black poplar encourages vigorous development and preserves its structural soundness. It can stimulate black poplar to grow more robustly and aids in maintaining a desired form and dimension.
What Is the Best Time for Pruning Black Poplar?
What Is the Best Time for Pruning Black Poplar?
Late winter and early spring are considered ideal for pruning black poplar due to several factors. This timing allows cuts to mend quickly as the plant enters its active growth phase with the arrival of warmer temperatures, lessening the chance of disease infection. Pruning just before the spring growth surge ensures the plant's energy is directed towards developing new, healthy growth instead of supporting damaged or unnecessary branches. Additionally, since black poplar is deciduous and sheds its leaves in winter, pruning during this dormant period offers better visibility of the structure, enabling more precise cuts and shaping. Avoiding the flowering and fruiting periods ensures the plant's reproductive cycle is not interrupted, leading to a more vigorous specimen in the growing season.
What Tools Do I Need to Prune Black Poplar?
Hand Pruners
Perfect for cutting small branches up to ¾ inch in diameter on black poplar, especially when shaping the tree or removing minor damaged twigs.
Lopping Shears
Designed to handle branches between ¾ inch and 2 inches thick, these tools offer leverage and are suitable for removing larger, yet still relatively small, branches of black poplar.
Pole Pruners
Excellent for reaching higher branches on black poplar without needing a ladder; they can typically cut branches up to 1 inch in diameter.
Pruning Saws
Intended for branches over 2 inches thick that hand pruners and lopping shears cannot manage, ensuring clean cuts on black poplar without tearing the bark.
Chainsaw
Reserved for very thick branches or when performing major pruning tasks like removing large limbs on mature specimens of black poplar.
Wood Chipper
If significant limb removal is carried out on black poplar, a wood chipper can process pruned branches into mulch or for easier disposal.
Safety Equipment
Personal protective gear such as gloves, safety glasses, and hard hats should be worn when pruning black poplar to prevent injury.
Pruner Sharpener
Regularly sharpen the blades of cutting tools to maintain clean cuts and reduce the risk of disease or pests when pruning black poplar.
How to Prune Black Poplar
Step1: Assessment of Tree Health and Shape
Evaluate black poplar before pruning to identify Dead branches, Diseased wood, Crossing branches, Suckers, and Competing leaders. This species typically has a broad, open shape, so aim to maintain this natural form while removing problematic growth.
Step2: Timing Pruning to Seasonal Dormancy
Select the appropriate time of year to prune black poplar, which is usually in late winter or early spring before the tree breaks dormancy. Avoid pruning in late spring or early summer when sap flow is high.
Step3: Tool Sanitization Before Pruning
Sanitize your pruning tools to prevent the spread of disease. Use a 10% bleach solution or a disinfectant specifically formulated for garden tools.
Step4: Removing Dead Branches at Base
Begin pruning by removing all Dead branches. Make your cuts at the base of the dead wood, just above the point where the branch connects with a larger branch or the trunk. Do not cut into the collar of the branch, which is the swelling at the base of the branch.
Step5: Excising Diseased Wood and Proper Disposal
Cut out any Diseased wood, making sure to remove the entire affected area and a few inches into healthy wood to ensure the disease is fully excised. Dispose of diseased material properly, as it should not be composted.
Step6: Clearing Crossing Branches for Better Growth
Remove Crossing branches that are rubbing together or are likely to rub in the future. Choose to keep the branch that is healthier or better positioned to maintain the treeâs natural form. Cut the unwanted branch cleanly at its base.
Step7: Eliminating Suckers from Roots or Trunk
Identify and remove Suckers, which are vigorous vertical shoots that grow from the roots or the base of the trunk. Cut them down to the ground level or as close to their origin point as possible.
Step8: Selecting Strong Central Leader
Address any Competing leaders by selecting the strongest and best-positioned central leader. Remove other leaders by pruning them back to a lateral branch that is smaller in diameter than the one you are keeping, ensuring not to leave a stub.
Step9: Pruning Tool Maintenance Post-Trimming
After trimming, clean your tools again to ensure they are ready for future use, and to prevent the spread of any potential pathogens.
Post-Pruning Care for Black Poplar
Post-Pruning Care for Black Poplar
After pruning black poplar, promptly clean wounds with water to minimize infection. Balance light exposure, avoiding full sunlight, to reduce stress. Maintain moderate humidity and avoid temperature extremes. Support recovery with balanced fertilizer application, avoiding high nitrogen content. Regularly inspect black poplar for stress signalsâwilted leaves or cankersâand address by adjusting care conditions. If infection signs appear, apply appropriate fungicide or bactericide. Monitor soil moisture to keep consistent, especially during dry spells, ensuring optimal recovery and growth.
Common Pruning Mistakes with Black Poplar
Excessive Canopy Removal Stress
Over-pruning is a frequent error where too much of black poplar's canopy is removed in one session, which can stress the tree and lead to stunted growth or increased vulnerability to pests and diseases.
Improper Branch Collar Cutting
Cutting branches flush against the trunk removes the branch collar, an area of tissue important for proper healing. This can result in improper wound closure and increase the risk of decay.
Neglecting Problematic Branches
Ignoring dead, diseased, or crossing branches during pruning can lead to further complications for black poplar, as these can be entry points for pests and pathogens or cause damage as the branches rub together.
Bark Tearing from Unsupported Cuts
Making large cuts without proper support can lead to tearing of the bark, which damages black poplar's trunk and can invite disease and decay.
Spreading Disease with Unsterilized Tools
Lack of sterilization of pruning tools can spread disease from one part of black poplar to another or even between different plants.
Common Pruning Tips for Black Poplar
Proper Lateral Cutting Technique
When reducing the height or width of black poplar, make cuts to lateral branches using the 1/3 and 1/4 rule, where the lateral branch is at least one-third the diameter of the limb being removed to ensure good healing and regrowth.
Angled Cuts for Water Runoff
Always prune back to a branch, bud, or the trunk by making angled cuts that allow water to run off the wound, and are positioned to encourage growth in the desired direction.
Thinning Cuts for Better Light and Air
To manage black poplar's size and shape, use thinning cuts to remove entire branches back to the trunk or to a main limb to improve light penetration and air circulation within the canopy.
Clean Cuts with Sterilized Tools
Use sharp and sterile pruning tools for clean cuts that heal quickly, and disinfect them between cuts if pruning diseased branches.
Three-Cut Method for Large Branches
When dealing with larger branches, use the three-cut method: first, an undercut away from the branch collar to prevent bark peeling; second, a top cut further out to remove the majority of the branch weight; finally, a third finishing cut just outside the branch collar to promote proper healing.


