How to Prune Quaking aspen?
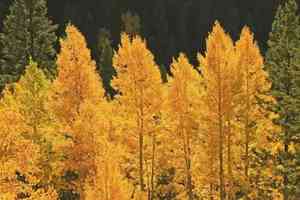
This deciduous tree, celebrated for its trembling foliage and striking white bark, flourishes in colder environments. Key pruning methods for quaking aspen involve reducing crowded branches and excising impaired or infected boughs to foster robust development and adequate airflow. The most favorable time for pruning is from late winter to early spring, while the tree is dormant, to lessen strain and prevent excessive sap leakage. Trimming quaking aspen offers advantages such as an improved tree shape, a decreased likelihood of illness, and stimulated fresh growth.
What Are the Benefits of Pruning Quaking Aspen?
What Are the Benefits of Pruning Quaking Aspen?
Trimming quaking aspen promotes robust development and maintains its desired form. It helps eliminate dead or diseased branches, fosters a strong structure, and enhances air movement within the foliage.
What Is the Best Time for Pruning Quaking Aspen?
What Is the Best Time for Pruning Quaking Aspen?
Trimming quaking aspen in early spring or late winter is advantageous because the plant remains dormant, reducing the risk of sap leakage that could attract pests or cause illness. Furthermore, this timing allows gardeners to remove any damaged or unhealthy wood before new leaves and branches emerge, thus not disrupting the season's growth cycle. Pruning at this time also offers the chance to shape the plant for the upcoming year without leaf obstruction, making its structure more visible. It's crucial to avoid pruning quaking aspen in late summer or early fall, as this can stimulate new growth that won't have sufficient time to harden before cold weather, increasing the risk of winter damage.
What Tools Do I Need to Prune Quaking Aspen?
Hand Pruners
Perfect for cutting small branches under 1 inch in diameter on quaking aspen. Essential for precise work and making clean cuts to aid recovery.
Loppers
Ideal for reaching and cutting branches 1 to 2 inches in diameter at higher levels in quaking aspen, thanks to long handles providing leverage.
Pole Pruner
Used for cutting elevated branches without needing a ladder. Suitable for quaking aspen if tree heights require it.
Pruning Saw
Required for sawing through branches thicker than 2 inches on quaking aspen, ensuring a clean cut without harming adjacent branches.
Shears
Useful for shaping and trimming the slender, new growth on quaking aspen, ensuring attractive and healthy growth patterns.
Pruning Gloves
To guard against scratches or sap while trimming quaking aspen.
Safety Glasses
To shield eyes from falling debris or sawdust when pruning quaking aspen.
How to Prune Quaking Aspen
Step1: Assessment and Planning
Evaluate quaking aspen before pruning to identify dead wood, diseased branches, and weak limbs. This initial step enables you to formulate a strategy focused on removing these parts without harming the rest of the plant.
Step2: Tool Sterilization
Sanitize your pruning tools with a solution of 1 part bleach to 9 parts water to prevent disease transmission. Sharp tools create cleaner cuts that heal faster.
Step3: Pruning Dead Wood
Begin by trimming dead wood, identifiable by its brittle, dry appearance and lack of leaves. Make cuts just above a healthy bud or branch junction at a 45-degree angle, ensuring the lowest point of the cut is opposite the bud, allowing water to drain from the cut surface.
Step4: Removing Diseased Branches
Next, remove diseased branches. Cut at least 6 inches into healthy wood beyond the affected tissue to prevent disease spread. Avoid cutting into the branch collar, as it's crucial for forming a proper seal over the wound.
Step5: Weak Limb Identification
Identify weak limbs that may be narrow-angled, spindly, or structurally unsound. Trim these limbs back to a main branch or remove them entirely if they don't contribute to the overall form of quaking aspen.
Step6: Smooth Cut Execution
Ensure all cuts are smooth and clean to prevent further damage to quaking aspen. Ripped or jagged edges can attract pests and disease, hindering the healing process.
Step7: Timing for Dormancy
Pruning should be timed to coincide with quaking aspen's dormancy period, from late winter to early spring before new growth begins. This timing reduces stress and the chance of disease infection.
Step8: Disposal of Cuttings
Discard all cuttings, especially diseased material, away from quaking aspen to prevent any potential spread of disease or pests to the tree or surrounding area.
Step9: Post-Pruning Care
After pruning, care for quaking aspen by providing adequate water and applying a balanced fertilizer to promote healthy growth and recovery from pruning stress.
Post-Pruning Care for Quaking Aspen
Post-Pruning Care for Quaking Aspen
Following pruning of quaking aspen, promptly apply a wound dressing to guard against diseases. Ensure quaking aspen receives ample sunlight, with moderate watering to maintain soil moisture without waterlogging. Adjust pruning frequency according to seasonal growth cycles. Fertilize with a balanced, slow-release formula to encourage recovery. Regularly inspect the pruned areas for signs of distress or infection, such as discoloration or oozing. If symptoms appear, consult a plant health specialist for appropriate treatments.
Common Pruning Mistakes with Quaking Aspen
Excessive Foliage Removal Inhibiting Photosynthesis
Over-trimming, which can stress quaking aspen by removing too much foliage and hindering photosynthesis.
Spreading Disease with Unsterilized Pruning Tools
Trimming without sanitizing tools, which can spread diseases to quaking aspen or introduce new infections.
Bark Damage from Incorrect Limb Removal
Tearing or ripping the bark when removing larger limbs, which can create wounds on quaking aspen that may lead to decay or pests.
Neglecting Diseased or Damaged Limbs
Ignoring diseased or damaged limbs, which can impede the overall health of quaking aspen and spread issues to other parts of the plant.
Improper Flush Cuts Slowing Healing Process
Making flush cuts against the trunk, which can remove the branch collar and slow down the healing process of quaking aspen.
Common Pruning Tips for Quaking Aspen
Clean Cuts with Sterilized, Sharp Tools Prevent Disease
Utilize sharp, clean pruning tools to make precise cuts that will heal more efficiently and protect quaking aspen from disease.
Three-Cut Technique to Avoid Bark Tearing
When removing larger branches, employ the three-cut technique to prevent bark tearing: make an undercut on the branch's underside, a relief cut further out, and finally a clean cut through the branch just beyond the branch collar.
Preserve Branch Collar for Efficient Healing
Trim just outside the branch collar, not flush with the trunk; the collar contains cells that help quaking aspen recover from the wound.
Regular Removal of Dead or Diseased Limbs for Plant Health
Periodically remove dead, diseased, or damaged limbs to maintain the health and appearance of quaking aspen.
Improve Plant Vigor with Canopy Thinning for Air and Light
Thin out dense areas of quaking aspen's canopy to enhance air circulation and light penetration, which can reduce the likelihood of disease and improve overall plant vigor.


