How to Prune Bur oak?
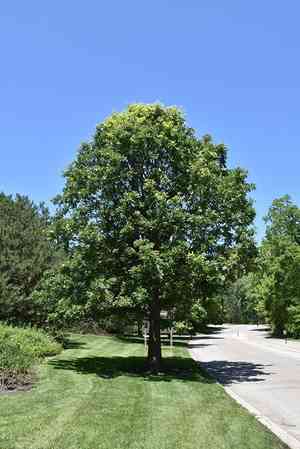
Distinguished by its expansive crown and coarse bark, the bur oak stands as a resilient, enduring tree. Perform pruning during its inactive period, generally in late winter or early spring, to foster robust structure and development. Essential methods involve excising dead or ailing wood, reducing dense branches to boost light access and air circulation, and sculpting for visual appeal. Refrain from over-thinning and uphold the tree's inherent shape. Consistent trimming boosts vigor and can avert subsequent harm from branch fractures.
What Are the Benefits of Pruning Bur Oak?
What Are the Benefits of Pruning Bur Oak?
Trimming bur oak encourages robust development and maintains its form. Strategic cuts enhance light penetration and air circulation, crucial for bur oak's vigor. Regular trimming also eliminates dead wood, preventing pests and diseases while ensuring a strong, attractive shape.
What Is the Best Time for Pruning Bur Oak?
What Is the Best Time for Pruning Bur Oak?
These periods are considered ideal for several reasons. During late winter, bur oak is in a dormant state, meaning the tree's sap is not actively flowing. Pruning then minimizes sap loss and potential stress. Additionally, without leaves, bur oak's structure is more visible, allowing for more precise cuts and shaping. Pruning before spring growth allows bur oak to heal and direct energy to desired growth points, resulting in a stronger, healthier structure for the upcoming season. It's important to avoid pruning bur oak in late spring or early summer as the tree's energy is focused on growth, and pruning would interfere. Moreover, avoid fall pruning since open wounds could be susceptible to fungal infections due to wet conditions. For bur oak, it's also beneficial to time pruning to avoid the oak wilt disease transmission period, typically during the growing season when disease-spreading beetles are active.
What Tools Do I Need to Prune Bur Oak?
Hand Pruners
Perfect for making clean cuts on small branches under 1 inch in diameter, helping maintain bur oak's shape and health.
Loppers
Designed for cutting branches up to 2 inches thick, offering the leverage and reach needed for bur oak's denser canopy.
Pruning Saw
Essential for cutting through larger branches over 2 inches thick, allowing for precise shaping and removal of dead wood from bur oak.
Pole Pruner
Provides extended reach for high branches, ensuring safe and effective pruning of bur oak without needing to climb.
Chainsaw
Useful for managing very thick branches or limbs and significant trimming tasks on mature bur oak, but requires careful operation.
Tree Pruning Sealer
Applied after cutting large limbs to protect bur oak from diseases and pests by sealing the wounds.
How to Prune Bur Oak
Step1: Assessment and Timing of Pruning
Evaluate bur oak's overall health and structure before pruning. Choose a dry day outside of bur oak's active growing season, ideally late winter or early spring, to prevent attracting pests or diseases.
Step2: Tool Sterilization
Sanitize your pruning tools with alcohol or a 10% bleach solution to prevent disease transmission.
Step3: Pruning for Clearance and Safety
Identify lower branches that obstruct pathways, block views, or show signs of weakness. Ensure these branches are at least 2-3 years old, as cutting newer growth can harm bur oak.
Step4: Branch Removal Technique
Make cuts on the lower branches using the three-cut method: first, saw an undercut about 6-12 inches from the trunk, one-third into the branch. Second, move a couple of inches beyond the undercut and saw downward to remove the branch. Third, clean up the remaining stub, making a final cut just outside the branch collar, the swollen area of trunk tissue that forms around the base of a branch.
Step5: Diseased Wood Identification and Removal
Look for diseased wood, characterized by discoloration, cankers, or decay. Remove these branches at their point of origin or back to a lateral branch or bud that is outward facing.
Step6: Removal of Damaged Limbs
Inspect bur oak for broken limbs resulting from wind damage or other stressors. Prune these limbs back to the next healthy, undamaged section using an appropriate cutting method similar to that outlined in Step 4.
Step7: Thinning for Light and Air Circulation
Thin out crowded areas to improve light penetration and air circulation. Remove smaller branches that cross or rub against each other using precise cuts just above buds that are facing outwards, to encourage outward growth.
Step8: Shaping the Plant
Shape bur oak for aesthetic purposes if necessary by selecting a central leader and evenly spaced lateral branches, but avoid over-pruning as bur oak generally requires minimal shaping.
Step9: Post-Pruning Cleanup
Clear all pruning debris from around bur oak to prevent potential pest and disease issues.
Step10: Post-Pruning Monitoring and Care
Monitor the pruned areas for signs of disease or pests over the next few months, and ensure proper care and watering for bur oak's recovery.
Post-Pruning Care for Bur Oak
Post-Pruning Care for Bur Oak
Immediately after pruning bur oak, ensure cuts are clean to aid healing. Maintain consistent soil moisture without overwatering. Provide bur oak with partial to full sunlight and protection from extreme temperatures. Fertilize with a balanced, slow-release formula to assist recovery but avoid over-fertilization. Regularly inspect bur oak for signs of distress, such as discolored leaves or sap oozing from wounds, indicating potential infection. Should signs of stress or disease emerge, consult an arborist for appropriate treatments.
Common Pruning Mistakes with Bur Oak
Over-pruning and vulnerability to ailments
Pruning excessively at once, which can stress bur oak and increase its susceptibility to diseases and pests.
Improper cutting techniques damaging plant
Making incorrect cuts, such as leaving stubs or tearing the bark, which can create open wounds and impede bur oak's natural healing process.
Leader stem removal affecting structure
Cutting off the main leader stem, which can alter bur oak's natural form and potentially weaken its structure.
Neglecting removal of dead or sickly wood
Ignoring the need to remove dead or diseased wood, which can lead to further decay and infestations.
Incorrect branch cutting damaging trunk
Pruning branches flush against the trunk, which removes the branch collar and can result in improper wound closure.
Common Pruning Tips for Bur Oak
Use sharp tools for quick recovery
Use clean, sharp tools to make precise cuts, which will help bur oak recover more quickly and reduce disease risk.
Prune for natural shape and branch health
Prune to maintain bur oak's natural shape, focusing on removing crossing branches that could rub against each other and create wounds.
Cut outside branch collar for proper healing
Cut just outside the branch collar, not flush with the trunk, to preserve bur oak's natural defense mechanisms and promote better healing.
Regular removal of unhealthy wood
Remove dead, diseased, or damaged wood as it occurs to keep bur oak healthy and prevent the spread of decay.
Thinning for better air flow and growth
Thinning out crowded branches can improve air circulation and light penetration, which encourages healthy growth and flowering in bur oak.


