How to Prune Siberian squill?
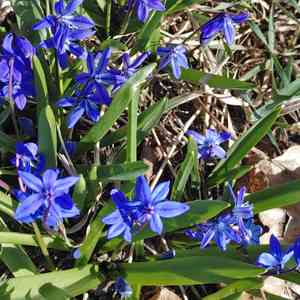
Siberian squill, a robust, bulb-forming perennial recognized for its vivid blue blossoms, needs very little trimming. Following its blooming period, permit the foliage to wither organically, which supplies nutrients for the subsequent year's development. Only snip off faded flower stems; cut back dead leaves once they have turned yellow. Perform pruning from early spring until late summer. Advantages of pruning encompass neat development and the avoidance of unwanted self-propagation. Concentrate on clearing away decaying matter to preserve the plant's well-being.
Advantages of Trimming Siberian Squill
Advantages of Trimming Siberian Squill
Trimming siberian squill promotes robust development and assists in maintaining its desired form. This selective reduction ensures the plant stays healthy and visually appealing in garden settings.
Optimal Period for Pruning Siberian Squill
Optimal Period for Pruning Siberian Squill
Pruning siberian squill in early spring, prior to new growth, minimizes disruption to its life cycle, lessening stress and disease risk. Late summer pruning, after siberian squill has bloomed and seeds have scattered, enables gardeners to shape the plant and remove faded flowers without impacting the subsequent year's blossoms. This timing aligns with siberian squill's dormancy, fostering vigorous growth in the next season.
Tools Required for Pruning Siberian Squill
Sharp Scissors or Snips
Given the delicate nature of siberian squill's leaves and blooms, sharp scissors or snips are advised for making clean cuts without harming the plant.
Hand Pruners
Siberian squill possesses relatively slender stems that are easily managed with hand pruners. These provide greater precision when removing faded flowers or dead foliage.
Gloves
Wearing gloves can safeguard your hands from potential skin irritants on the plant or in the soil while handling siberian squill.
Cleaning Alcohol or Disinfectant
Before and after pruning siberian squill, it is crucial to sanitize tools with alcohol or a disinfectant to prevent disease transmission.
How to Prune Siberian Squill
Step1: Await Post-Blooming Yellowing
After siberian squill has finished flowering and the blooms have withered, wait until the leaves turn yellow to brown, indicating they have completed photosynthesis and the plant has stored sufficient energy for the next season.
Step2: Remove Dead Foliage
Wearing gloves to protect your hands, use clean, sharp scissors or pruning shears to remove dead foliage. Cut the yellowed leaves at the base, near the soil line, being careful not to harm new growth or the bulb beneath the surface.
Step3: Identify and Divide Clumps
For overgrown clumps, pinpoint the boundaries of individual siberian squill plants. Gently dig around the clump you wish to divide, using a small hand trowel. Carefully lift the clump from the ground, minimizing root damage.
Step4: Separate Bulbs with Intact Roots
Separate the bulbs by hand, ensuring each division retains a portion of its roots. If necessary, use a sterile knife to cut through any tough roots connecting the bulbs.
Step5: Replant and Space Bulbs Appropriately
Replant the separated bulbs immediately at their original depth, spaced approximately 2-4 inches apart to prevent immediate overcrowding. Water the newly planted bulbs lightly to settle the soil around the roots.
Step6: Dispose of Dead Plant Material
Discard the dead foliage and any unhealthy or damaged bulbs that were removed. Composting is a sustainable option for foliage disposal, provided the plant material is disease-free.
Step7: Clean and Disinfect Tools
Clean tools thoroughly with a disinfectant solution after use to prevent disease spread. Store them in a dry place to avoid rust and deterioration.
Step8: Label and Mark Bulb Location
Mark the area where siberian squill bulbs are planted if needed to prevent accidental disturbance during the dormant season. Labeling is useful for tracking plant variety and bloom time.
Post-Pruning Care for Siberian Squill
Post-Pruning Care for Siberian Squill
Immediately after pruning siberian squill, ensure adequate hydration to aid recovery, without causing waterlogging. Maintain a partly shaded environment, keeping siberian squill out of direct afternoon sun. Provide stable temperatures and shield from strong winds. Post-pruning, apply a balanced, diluted liquid fertilizer to support growth. Monitor siberian squill for yellowing leaves or wilting as signs of stress. If infection signs like rot or mold appear, treat promptly with appropriate fungicides and adjust care conditions.
Common Pruning Errors with Siberian Squill
Premature Foliage Trimming Weakens Plant
Cutting back the foliage too early, which can weaken siberian squill by preventing the leaves from photosynthesizing and storing energy for the next season.
Excessive Pruning Harms Bulbs and Plant Health
Being too aggressive with pruning, which might damage the bulbs or remove the parts of siberian squill that are essential for its health and flowering abilities.
Failure to Deadhead Wastes Energy on Seeds
Neglecting to remove spent flowers, which may lead to energy being wasted on seed production rather than being stored in the bulbs for the next year's growth.
Common Pruning Advice for Siberian Squill
Delay Trimming Until Foliage Dies Back
Wait for the foliage of siberian squill to die back naturally before trimming it down. This allows the plant to redirect nutrients back into the bulbs.
Remove Spent Flowers to Strengthen Bulbs
Snip off spent flower stalks at the base post-bloom to redirect the plant's energy into bulb strengthening, not seed production.
Use Sharp Tools for Clean Pruning Cuts
Use clean, sharp pruning tools to make precise cuts, which helps prevent damage and disease to siberian squill.
Discard or Compost Dead Plant Material Safely
Discard or compost the foliage and spent flowers properly, reducing the risk of fungal diseases that can linger on dead plant material.


