How to Prune Common crownvetch?
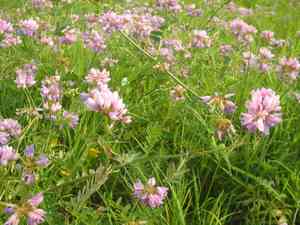
This enduring leguminous plant is recognized by its spreading nature and groupings of pink and white blossoms. Essential trimming methods for common crownvetch involve cutting back following the flowering period to foster more compact development and manage its expansion. The most effective time for pruning is in early spring prior to new growth emerging or in late summer once flowering has concluded. Consistent pruning deters common crownvetch from becoming overly aggressive and stimulates abundant flowering. Clippings must be discarded thoughtfully to prevent unintended proliferation.
Advantages of Trimming Common Crownvetch
Advantages of Trimming Common Crownvetch
Trimming common crownvetch promotes robust development by stimulating new shoots. Strategic cutting helps maintain an ideal form for both beauty and vitality.
Optimal Timing for Trimming Common Crownvetch
Optimal Timing for Trimming Common Crownvetch
Trimming in early spring allows for the removal of any dead or damaged branches before the plant expends energy on new growth, fostering a healthier plant structure. Late summer trimming is ideal as common crownvetch has typically completed its flowering cycle, minimizing disruption to its blooms and reducing the chance of removing new seed heads that aid in propagation. Furthermore, late summer trimming prepares common crownvetch for dormancy and can boost its vigor for the subsequent growing season.
Required Tools for Trimming Common Crownvetch
Hand Pruners
Given the relatively slender stems and sprawling habit of common crownvetch, hand pruners, also known as secateurs, are an essential implement. They enable precise cuts and are effective for shaping the plant while minimizing stem damage.
Gloves
Wearing gloves is crucial when trimming common crownvetch to safeguard the gardener's hands from scrapes and ensure a secure grip on tools.
Pruning Saw
For thicker, woodier stems that hand pruners cannot manage, a pruning saw is recommended. This tool will create clean cuts through the tougher sections of common crownvetch.
Long-Handled Loppers
To reach deeper into the dense masses of common crownvetch without straining the gardener's back, long-handled loppers are useful for cutting thicker stems beyond the reach of hand pruners.
Pruning Shears (Hedge Clippers)
For shaping and managing the growth of common crownvetch, especially when tidying a larger area or handling multiple plants, pruning shears or hedge clippers facilitate quick, repetitive cuts.
How to Trim Common Crownvetch
Step1: Initial Plant Assessment
Examine common crownvetch before trimming to identify spent flowers, weak stems, and overgrown shoots. This initial check helps determine the extent of trimming needed.
Step2: Tool Sterilization
Sanitize trimming tools before beginning to prevent disease transmission. Clean blades with rubbing alcohol or a solution of one part bleach to nine parts water.
Step3: Deadhead Spent Blooms
Begin with faded flowers. Locate spent blooms where petals have dropped. Make cuts just above the nearest leaf set to encourage new growth and more blossoms.
Step4: Trim Weak Stems
Identify weak stems on common crownvetch that appear thinner or less robust. Use sharp trimming shears to make clean cuts at the base of these stems, close to the main plant structure.
Step5: Prune Overgrown Shoots
Address overgrown shoots that disrupt the form of common crownvetch. Trim these selectively to maintain a balanced shape, cutting back to a side shoot or bud facing the desired growth direction.
Step6: Thinning for Airflow
Thin out dense areas of common crownvetch to enhance air circulation. Selectively remove some shoots and stems at their bases to open up the plant and reduce the risk of fungal diseases.
Step7: Shaping the Plant
Shape common crownvetch by cutting back the plant to maintain a desired size and form. Remember, common crownvetch can be vigorous, so consider its natural spreading habit when deciding on the shape.
Step8: Post-Trimming Cleanup
After trimming, clear all debris from around common crownvetch to lessen the chance of disease and pests. Dispose of the trimmings, especially any diseased or dead material.
Step9: Watering After Trimming
Water common crownvetch thoroughly after trimming to reduce plant stress and aid in quicker recovery.
Step10: Monitor Plant Health
Observe common crownvetch post-trimming for signs of new growth and vitality. Additional care, such as fertilization, may be necessary to support recovery and development.
Aftercare for Common Crownvetch Post-Trimming
Aftercare for Common Crownvetch Post-Trimming
Water the plant thoroughly to aid in its recovery. Optimal light exposure is vital; ensure partial sun. Regulate humidity and maintain a consistent temperature. Introduce a balanced fertilizer to replenish nutrients and stimulate growth. Regularly inspect common crownvetch for signs of stress, such as discoloration or wilting, and treat promptly if an infection is detected, considering fungicide or pesticide applications only when necessary.
Common Trimming Errors with Common Crownvetch
Excessive Trimming: Detrimental to Plant Vigor
Over-trimming, which can stress common crownvetch and lead to reduced vitality or prolificacy.
Inappropriate Tools: Ragged Cuts and Disease Risk
Using dull or unclean trimming tools, potentially causing ragged cuts and introducing disease to common crownvetch.
Incorrect Cut Placement: Structural Damage Hazard
Trimming too close to the main stem or crown, which may compromise the plant's structural integrity.
Tearing Stems: Unnecessary Plant Injury
Tearing stems instead of cutting cleanly, which can cause undue harm to common crownvetch.
Neglecting Dead Growth: Poor Plant Health
Ignoring diseased or dead growth, which can detract from common crownvetch's appearance and health.
General Trimming Advice for Common Crownvetch
Use Sharp, Clean Shears for Quick Healing
Use sharp, clean trimming shears to make precise cuts on common crownvetch that will heal more rapidly.
Cut at 45-Degree Angle Above Nodes for Growth
Cut at a 45-degree angle, just above a leaf node or side branch, to encourage healthy new growth in common crownvetch.
Trim Only Necessary Growth for Plant Health
Remove only the essential amount of growth to shape common crownvetch or to eliminate dead or diseased foliage.
Regular Inspection: Prevent Overgrowth and Entanglement
Regularly inspect common crownvetch for signs of excessive growth or entanglement and address promptly to maintain plant health.
Deadhead After Flowering for Tidiness and Reblooming
After flowering, trim back the spent flower clusters of common crownvetch to encourage a neater appearance and potentially a second bloom.


