How to Prune Arborvitae?
Celebrated for its thick, perennial leaves and pyramidal structure, arborvitae thrives with consistent trimming to preserve its vitality and preferred outline. Essential methods encompass thinning out, contouring, and excising lifeless or ailing limbs. The ideal period for pruning is throughout winter's inactive phase, steering clear of late-season incisions that could stimulate development vulnerable to freezing temperatures. Trimming improves air movement and can revitalize mature examples by fostering fresh growth within the plants' inherent profile.
What Are the Benefits of Pruning Arborvitae?
What Are the Benefits of Pruning Arborvitae?
Trimming arborvitae promotes vigorous development and maintains its desired form. Regular cutting encourages a dense, healthy leaf structure, vital for the plant's beauty and vigor.
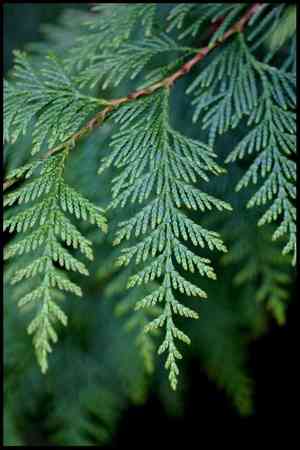
What Is the Best Time for Pruning Arborvitae?
What Is the Best Time for Pruning Arborvitae?
Pruning arborvitae in late winter is considered ideal because it allows gardeners to shape the plant without disrupting its natural growth cycle. It also enables the plant to recover from cuts before its active spring growth, which can lower the risk of disease and pest issues. Removing dead or weak branches at this time ensures the plant's energy is directed towards healthy development. Additionally, the absence of leaves during this season provides better visibility of the plantâs structure, thus, facilitating a more efficient pruning process. It's important to avoid heavy pruning once spring growth has begun, as this can lead to stress and reduced health of arborvitae.
What Tools Do I Need to Prune Arborvitae?
Hand Pruners
Perfect for cutting small branches and twigs of arborvitae up to 3/4 inches in diameter. They allow for precise cuts, helping to maintain the plant's health and form.
Lopping Shears
Useful for branches with a diameter of 3/4 to 1 1/2 inches. These offer greater leverage and are suitable for shaping arborvitae and thinning out denser foliage.
Hedge Shears
Designed for shaping and trimming hedges, including arborvitae. They facilitate even cuts and encourage a dense growth habit in these plants.
Pole Pruner
Allows gardeners to reach higher branches without needing a ladder. This is important for maintaining taller specimens of arborvitae.
Pruning Saw
Essential for removing larger branches over 1 1/2 inches in diameter. Saws make it possible to cut through thick wood cleanly and with minimal damage to arborvitae.
How to Prune Arborvitae
Step1: Timing Pruning Season
Select the appropriate time of year to prune arborvitae, typically in late winter or early spring before new growth begins. Avoid pruning in the fall as cuts can dry out over winter.
Step2: Removing Dead Wood
Start by removing any dead wood. Use sharp bypass pruners or a saw for thicker branches. Cut dead branches back to living tissue, identifiable by a change in color and texture. Make cuts at a slight angle to prevent water accumulation that can cause rot.
Step3: Snipping Yellow Foliage
Identify and remove yellow foliage, which can indicate overwatering, poor drainage, or root problems. Snip off the yellowing parts just above new, green growth or back to the main branch if no green growth is nearby. Ensure cuts are clean to promote good healing.
Step4: Thinning Overgrown Branches
Prune overgrown branches to maintain the shape of arborvitae. Make selective cuts to thin out branches, improving sunlight penetration and air circulation. Cuts should be made just above a lateral branch or bud pointing in the desired direction of new growth.
Step5: Shaping Young Growth
For shaping arborvitae, avoid cutting into the older, woodier part of the plant as it may not regenerate. Shape young growth by trimming back to a desired length, ensuring you are cutting just above a set of leaves or branching point.
Step6: Checking Pruning Symmetry
After each cut, step back to assess the shape of arborvitae. It's important to prune gradually and symmetrically to maintain a natural shape and avoid over-pruning which could damage arborvitae.
Step7: Composting Pruned Material
Dispose of all pruned material by composting healthy clippings and discarding diseased or pest-infested branches appropriately.
Step8: Cleaning Pruning Tools
Clean and disinfect all pruning tools after use to prevent spreading diseases to other plants or to arborvitae in the future.
Step9: Watering and Fertilizing After Pruning
Water arborvitae after pruning to help reduce plant stress and support its recovery. Fertilize if necessary, according to the specific needs of arborvitae.
Post-Pruning Care for Arborvitae
Post-Pruning Care for Arborvitae
After pruning arborvitae, water it thoroughly to help alleviate pruning stress. Maintain consistent moisture without overwatering to prevent root rot. Ensure arborvitae is placed in an area with adequate indirect light to promote healing while avoiding scorching from direct sunlight. Adjust temperature and humidity to replicate arborvitae's preferred environmentâcool and moist. Fertilize with a balanced, slow-release fertilizer to support new growth, applying it according to product instructions. Regularly inspect arborvitae for signs of disease or pest infestation, such as discolored foliage or unusual sap oozing. Upon detection, treat promptly with appropriate horticultural methods.
Common Pruning Mistakes with Arborvitae
Avoid cutting into non-regenerative old wood
Cutting back into old wood where no green foliage is present. Arborvitae has limited to no ability to regrow from old wood, which can lead to bare patches that never fill in.
Do not over-prune and stress the plant
Over-pruning where too much of arborvitae's foliage is removed at once. This mistake can stress the plant, leading to poor health or a less aesthetically appealing shape.
Use sharp, clean tools for healthy cuts
Using dull or unclean tools to prune arborvitae can result in jagged cuts that are more prone to disease and pests, as well as hindering the plant's ability to heal properly.
Prune with a plan for even growth
Pruning without a clear goal or plan, resulting in an uneven or unnatural shape that may compromise the plant's structural integrity and overall appearance.
Prune interior for air and light, avoid over-thinning
Neglecting to prune the interior of arborvitae, which can lead to insufficient air circulation and light penetration, fostering an environment for pests and diseases. However, care should be taken not to over-thin the interior.
Common Pruning Tips for Arborvitae
Make clean cuts with sharp, sterile tools
Use sharp, clean pruning shears or loppers to make clean, precise cuts. This ensures healthier and quicker healing for arborvitae, reducing the risk of disease.
Follow plant's natural form when shaping
When shaping arborvitae, follow its natural form, tapering the top narrower than the base to ensure the lower branches receive adequate sunlight.
Selectively thin new growth to maintain shape
Thin selectively rather than shearing uniformly. Remove some of the new growth to preserve the natural shape of arborvitae and promote more robust foliage from within.
Stagger rejuvenation pruning to reduce stress
For rejuvenation, stagger intensive pruning over several seasons rather than performing it all at once to minimize stress on arborvitae and preserve its health.
Cut above lateral branches to direct growth
When removing a branch, cut just above a lateral branch or bud that is facing the direction you want new growth to go, which helps direct arborvitae's shape more effectively.


