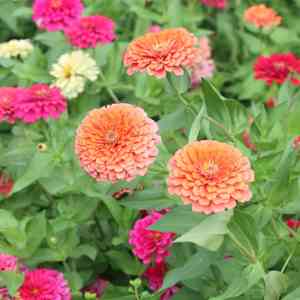
How to Prune Common zinnia?
Originating in Mexico, Zinnia elegans displays brilliant, lengthy-stemmed blossoms perfect for floral arrangements. Removing faded flowers stimulates additional blooming and preserves visual appeal. Shorten elongated stalks mid-season to foster denser development. The best time for pruning is from early spring to late autumn, coinciding with periods of vigorous growth. Consistent trimming averts excessive density and improves air movement, lowering the chance of illness. Make cuts at a 45-degree angle just above a leaf joint to encourage robust regeneration.
Advantages of Trimming Common Zinnia
Advantages of Trimming Common Zinnia
Trimming common zinnia promotes robust development and maintains an appealing form, ensuring a strong framework for abundant flowers.
Optimal Time for Trimming Common Zinnia
Optimal Time for Trimming Common Zinnia
Trimming common zinnia in early spring stimulates vigorous growth as the plant emerges from dormancy, directing its energy towards new shoots. Additionally, cutting common zinnia during the growing season encourages a bushier habit and improves flowering. Performing this before late autumn is vital, as late pruning can result in new growth vulnerable to frost damage. This timing aligns with common zinnia's natural life cycle, ensuring the plant stays healthy and produces many blooms.
Tools Required for Trimming Common Zinnia
Bypass Pruners
Perfect for making clean cuts on common zinnia stems, allowing for precise removal of faded flowers and shaping the plant.
Gardening Shears
Useful for trimming and shaping common zinnia when deadheading multiple blossoms or managing denser growth.
Gloves
Hand protection while trimming common zinnia, to prevent irritation from plant sap and contact with sharp implements.
Disinfectant
To sanitize tools before and after trimming common zinnia, preventing the spread of illness between plants.
How to Trim Common Zinnia
Step1: Identifying Spent Flowers
Locate the dead or fading flowers on common zinnia. These are typically found at the stem tips and may appear withered, discolored, or dry.
Step2: Cutting Off Dead Blooms
Using sharp, clean pruning shears, snip off the dead flowers at a 45-degree angle, approximately 1/4 inch above a leaf set or branch node. This will encourage common zinnia to produce more flowers.
Step3: Spotting Damaged Stems
Inspect common zinnia for any damaged stems, which might be caused by pests, disease, or weather. Look for signs such as discoloration, cracks, or wilting.
Step4: Removing Damaged Stems
Eliminate the damaged stems by cutting them back to a healthy section of the stem. Ensure the cut is made just above a leaf node or branching point to promote healthy regrowth.
Step5: Assessing Overgrowth
Check common zinnia for excessively long stems that may be causing the plant to lose its form or affecting its overall health by restricting light and air circulation to the lower parts of the plant.
Step6: Shaping and Trimming Overgrown Stems
Cut back the overgrown stems to the desired length, making sure to cut just above a leaf node or side shoot. This will help maintain common zinnia's shape and encourage bushier growth.
Step7: Tool Sanitization After Trimming
After trimming, clean your tools to prevent disease transmission. Wipe the blades with a cloth soaked in isopropyl alcohol or a 10% bleach solution.
Step8: Proper Disposal of Cuttings
Dispose of the cuttings correctly. Do not leave them on the ground as they can attract pests or contribute to fungal issues.
Step9: Post-Trimming Plant Hydration
Water common zinnia thoroughly after trimming, as this can help alleviate plant stress and promote recovery and new growth.
Step10: Plant Health Monitoring
Monitor common zinnia after trimming, looking for healthy new growth and any additional dead or damaged areas that may require future attention.
Aftercare for Common Zinnia Following Trimming
Aftercare for Common Zinnia Following Trimming
Immediately after trimming common zinnia, ensure sufficient light without direct scorching sun. Maintain moderate humidity and mild temperatures to lessen stress. Apply balanced, diluted fertilizer to aid regrowth. Regularly check common zinnia for wilting or discoloration indicating stress or infection. If symptoms appear, adjust care or seek plant-specific solutions. Prompt and appropriate post-trimming actions can significantly enhance common zinnia's recovery and future blooming.
Common Trimming Errors with Common Zinnia
Excessive trimming reduces photosynthesis
Over-trimming, which involves removing too much foliage, can weaken common zinnia by diminishing its capacity to photosynthesize.
Incorrect selection leads to uneven shape
Trimming indiscriminately without choosing the right stems or flowers to cut, which can result in an unbalanced plant shape and less vigorous flowering.
Unclean cuts increase disease risk
Not using clean, sharp pruning shears, which can lead to jagged cuts that are more susceptible to pests and diseases.
General Trimming Advice for Common Zinnia
Deadheading encourages more blooms
Focus on deadheading, which means removing spent flowers to encourage common zinnia to produce more blooms and to maintain a neat appearance.
Angled cuts above nodes promote growth
When cutting back stems, make angled cuts above leaf nodes or buds to promote healthy new growth in common zinnia.
Remove damaged foliage to prevent disease
Regularly check for and remove any dead, damaged, or diseased foliage to keep common zinnia healthy and to prevent the spread of issues.


