Optimal Soil for Growing Poisonbulb: What You Need to Know
1
Poisonbulb thrives in soil with a pH between 6.5 and 7.5, which supports best nutrient absorption.
2
Adding organic material to the soil greatly improves its composition and richness.
3
Good soil drainage is essential for Poisonbulb to avoid root decay.
Optimal Soil Type for Poisonbulb Cultivation
Perfect Soil Makeup
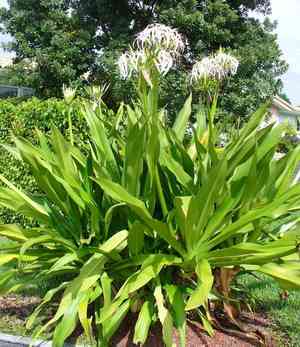
The Poisonbulb, recognized for its striking white blooms and vibrant green foliage, flourishes in well-drained soil with a loamy consistency. An appropriate mix of sand, silt, and clay guarantees the soil retains sufficient moisture while allowing excess water to escape. A composition of 40% sand, 40% silt, and 20% clay frequently offers the best medium for robust Poisonbulb growth.
Regulating Soil pH
Maintaining the correct soil pH is crucial for the Poisonbulb's vitality. The ideal pH range for this plant is between 6.5 and 7.5. This pH level ensures that essential nutrients are readily available for uptake. To assess and modify soil pH, you can utilize a home soil testing kit. If the pH is too low (acidic), adding lime can help raise it. Conversely, if the soil is too alkaline, incorporating sulfur can help lower the pH to the desired level.
Drainage Requirements
Proper soil drainage is essential for Poisonbulb, as standing water can cause root rot and other fungal diseases. To enhance drainage, consider incorporating perlite, coarse sand, or small gravel into your soil blend. Raised beds or mounding the soil can also improve water runoff. Ensuring your planting site or container has adequate drainage holes is another simple yet effective measure.
Preparing Soil for Poisonbulb Planting
Soil Sterilization Methods
Before planting Poisonbulb, it's important to ensure the soil is free from harmful pathogens and pests. Soil sterilization can be achieved through solarizationâa technique where you cover the soil with clear plastic and allow the sun's heat to sterilize it over several weeks. Another effective method is using a steam sterilizer, which involves steaming the soil for 30 minutes at approximately 82°C (180°F) to eliminate unwanted organisms.
Enriching Soil with Organic Matter
Amending the soil with organic matter can enhance its structure, fertility, and moisture retention. Adding compost, well-rotted manure, or leaf mold to your garden beds enriches the soil with vital nutrients. Aim to incorporate 5-10 cm (2-4 inches) of organic matter into the top 15-20 cm (6-8 inches) of soil. This practice not only boosts soil health but also supports the vigorous growth of Poisonbulb.
Effective Mulch Application
Mulching around your Poisonbulb plants helps retain soil moisture, regulate temperature, and suppress weed growth. Organic mulches such as straw, wood chips, or bark can decompose over time, adding nutrients back into the soil. Apply a 5-7.5 cm (2-3 inches) layer of mulch around the plants, ensuring it doesn't touch the stems to prevent rot.
Common Soil Issues and Solutions for Poisonbulb
Addressing Poor Drainage
Inadequate soil drainage can be detrimental to Poisonbulb. To counter this, aerate compacted soils by tilling and incorporating organic matter like compost. Installing drainage systems, such as French drains, can also help manage excess water. Raised beds or containers with sufficient drainage holes offer a simpler solution for smaller gardens.
Resolving Nutrient Deficiencies
Yellowing leaves or stunted growth in Poisonbulb may indicate a lack of nutrients. Conduct a soil test to pinpoint specific missing nutrients. Adding a balanced fertilizer or targeted amendments like bone meal (for phosphorus) or greensand (for potassium) can correct deficiencies. Regularly incorporating compost also helps replenish nutrients naturally.
Managing Soil-borne Diseases
Soil-borne diseases, such as fungal infections, can impact Poisonbulb. Prevent these issues by practicing crop rotation and planting disease-resistant varieties. If a plant shows signs of disease, remove and destroy the affected parts promptly. Soil solarization and sterilization methods can also help eliminate persistent pathogens before planting.
Maintaining Soil Health for Poisonbulb
Routine Soil Analysis
Regular soil testing is crucial for maintaining optimal soil health for Poisonbulb. At least once a year, use a soil test kit or send samples to a local extension service. These tests provide insights into pH levels and nutrient content, guiding you on necessary amendments. Adjusting the soil based on these results ensures that Poisonbulb's nutritional needs are met year-round.
Applying Fertilizers
Properly fertilizing Poisonbulb can enhance its growth and blooming. Use a balanced, slow-release fertilizer, such as a 10-10-10 (N-P-K) mix, applied in early spring. Avoid over-fertilizing, which can lead to nutrient imbalances and harm the plant. Organic fertilizers like fish emulsion or compost tea are alternative options that provide a gentler nutrient boost.
Enhancing Soil Aeration
Soil aeration is vital for the health of Poisonbulb, as it allows roots to breathe and absorb nutrients effectively. Regularly aerate garden beds by lightly tilling the soil to avoid compaction. For potted plants, consider repotting with fresh soil every couple of years to maintain aeration. Adding coarse materials like perlite or bark chips to the soil mix can also help improve aeration.


