How to Transplant Paperbark maple?
The optimal period for relocating paperbark maple is mid-spring, providing a mild environment conducive to root development. Select a location bathed in sunlight with soil that drains effectively. Should it be necessary, guarantee sufficient hydration post-transplant to facilitate recuperation.
What Preparations are Needed Before Transplanting Paperbark Maple?
What is the Ideal Time for Transplanting Paperbark Maple?
The optimal period for relocating paperbark maple spans from mid to late spring. This timeframe ensures the soil is adequately warm and the danger of frost has passed. Such timing allows the plant's root system to establish itself amidst mild temperatures and abundant spring moisture, fostering robust, resilient development. Capitalizing on this window maximizes your paperbark maple's potential to flourish in its new spot, making the most of the upcoming growing season.
How Much Space Should You Leave Between Paperbark Maple Plants?
Excellent beginning! For paperbark maple, provide ample room for development by spacing each plant approximately 15-20 feet (4.5-6 meters) apart. This distance will enable each specimen to thrive and achieve its full potential without competition from neighboring plants.
What is the Best Soil Mix for Paperbark Maple Transplanting?
Quality soil works wonders. Paperbark maple thrives in well-draining soil. Prepare the ground with a foundation of rich compost or a slow-release granular fertilizer. This will supply the necessary nutrients for successful establishment post-transplant.
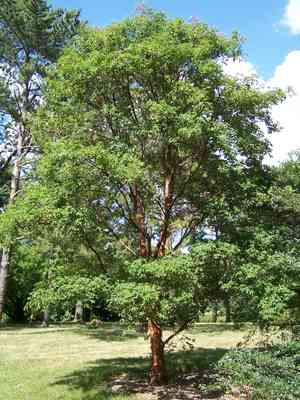
Where Should You Relocate Your Paperbark Maple?
Let's get some sun! Paperbark maple enjoys sunlight but also tolerates partial shade. Locate a spot that receives at least half a day of sun. Too much shade might hinder their optimal growth. Best of luck!
What Equipments Should You Prepare Before Transplantation Paperbark Maple?
Gardening Gloves
To protect your hands throughout the entire transplanting operation.
Shovel or Spade
For excavating the earth, and for extracting and moving the paperbark maple plant.
Garden Hose or Watering Can
To hydrate the paperbark maple before and after its relocation.
Wheelbarrow
To move the paperbark maple from its original spot to its new position.
Pruning Shears
To trim any damaged or diseased roots of the paperbark maple during the transplanting process.
How Do You Remove Paperbark Maple from the Soil?
How Do You Remove Paperbark Maple from the Soil?
From Ground: Start by watering the paperbark maple to moisten the surrounding soil; this makes removal easier. Use a shovel to dig a trench around the plant, being careful not to damage the root ball. Once a sufficient trench is created, go under the root ball with your shovel and gently lift the plant from its original location.From Pot: Begin by thoroughly watering the paperbark maple to create a damp environment. Invert the pot and tap its rim on a firm surface. The paperbark maple should slide out with the soil. If the plant resists, run a knife around the pot's interior to loosen it.From Seedling Tray: Gently press the soil beneath the seedling cell until the paperbark maple plant emerges, holding the seedling by its leaf, not the stem, to prevent damage.
Step-by-Step Guide for Transplanting Paperbark Maple
Preparing the New Site
Dig a hole in the new location that is twice as wide and the same depth as the paperbark maple's current root ball. This provides ample space for establishment.
Placing the Plant
Position the paperbark maple in the center of the hole, ensuring it is not planted deeper than its previous depth.
Adding Original Soil
Backfill the hole with the native soil. Gently pat it down to secure the plant and eliminate air pockets.
Watering
Thoroughly water the plant to settle the soil around its root ball.
Mulching
Apply a layer of organic mulch around the plant's base to retain soil moisture and regulate temperature.
How Do You Care For Paperbark Maple After Transplanting?
Monitoring Growth
Observe the paperbark maple to ensure it is healthy and adapting well post-transplant. Wilting or yellowing leaves may signal an issue. Adjusting
Watering
For the initial weeks following transplantation, the soil should remain consistently moist but not waterlogged. Gradually decrease watering as the plant matures and acclimates to its new environment.
Pruning
Avoid extensive pruning immediately after transplanting. Allow the paperbark maple time to recover from the stress of relocation. Later, prune any weak or dead branches to encourage vigorous growth.
Troubleshooting Common Issues with Paperbark Maple Transplantation.
When is the ideal time to transplant paperbark maple?
The optimal period for transplanting paperbark maple is from late spring to early summer (S2-S3). During this time, conditions are favorable for root development.
What should be the ideal spacing when I plant paperbark maple?
When planting paperbark maple, ensure there is a minimum of 15-20 feet (4.5-6 meters) between each plant. This provides sufficient space for optimal growth.
Is there a specific depth to plant paperbark maple after transplanting?
Yes, paperbark maple should be planted so the top of its root ball is flush with or slightly above ground level. Avoid planting too deeply to prevent root suffocation.
How do I prepare the soil before transplanting paperbark maple?
Begin by clearing weeds and other debris from the planting site. Then, incorporate organic matter like compost into the soil to enhance its nutrient content for paperbark maple.
How much should I water paperbark maple after transplanting?
Paperbark maple typically requires a thorough watering immediately after transplant. Also, remember to keep the soil consistently moist but not waterlogged. It might need additional watering during extreme heat.
Do I need to prune paperbark maple after transplanting?
Pruning is generally not necessary right after transplanting paperbark maple. However, if you observe any damaged branches, feel free to remove them for improved plant health.
What if the leaves on my paperbark maple start to turn yellow after transplantation?
Yellow leaves on your paperbark maple could indicate excessive watering or a nutrient deficiency. Adjust your watering schedule and consider adding a balanced slow-release fertilizer to your plant's soil.
How to stabilize the paperbark maple after transplanting?
Once you've transplanted paperbark maple, you can use stakes to help stabilize it until its roots take hold. Ensure your stakes do not harm the trunk or roots.
What can I do if my transplanted paperbark maple isn't showing new growth?
If your paperbark maple isn't exhibiting new growth after transplanting, do not be alarmed. It may simply be prioritizing root development first. Continue caring for it and allow it time to adjust.
How often should I fertilize my transplanted paperbark maple?
Fertilizing requirements can vary, but generally, applying a slow-release fertilizer once a year in early spring is adequate to maintain the health of your transplanted paperbark maple.


