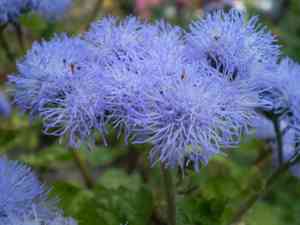
How to Transplant Flossflower?
The optimal period for relocating Ageratum houstonianum is in the temperate days of spring, once temperatures stabilize. Select a site featuring adequately draining earth and exposure to partial or full sunlight. Carefully separate the root mass to foster proper integration and prevent harm to fragile roots.
What Preparations are Needed Before Transplanting Flossflower?
What is the Ideal Time for Transplanting Flossflower?
The optimal window for moving flossflower spans from the onset of spring flowering until its conclusion. This period offers an ideal balance of light and warmth for flossflower to establish itself effectively. Furthermore, relocating flossflower at this juncture promotes robust development and vibrant coloration, providing a beautiful spectacle for your garden and enhancing its atmosphere. So, let's take advantage of this season and celebrate your garden's renewal with flossflower!
How Much Space Should You Leave Between Flossflower Plants?
When transplanting flossflower, we recommend positioning plants approximately 6-12 inches (15-30 cm) apart. This spacing allows ample room for growth and development without competition for resources.
What is the Best Soil Mix for Flossflower Transplanting?
To prepare the soil for flossflower, utilize a well-draining soil blend, rich in organic matter. A strong foundation can be established by incorporating compost and a slow-release balanced fertilizer (such as 10-10-10) into the planting area before transplantation.
Where Should You Relocate Your Flossflower?
When selecting a new home for your flossflower, choose a location that receives full sun to partial shade for most of the day. This will ensure your plant gets the optimal amount of sunlight for strong, healthy growth.
What Equipments Should You Prepare Before Transplantation Flossflower?
Gardening Gloves
To safeguard your hands while handling soil and the flossflower plant.
Trowel
For excavating suitable holes for transplantation.
Shovel or Spade
To carefully dig around the root ball for removing flossflower and preparing the planting site.
Watering Can
To hydrate the flossflower post-transplant and to moisten the soil.
Organic Mulch
To retain moisture and stabilize soil temperature after transplantation.
Garden Fork
To break up and aerate the soil before transplanting.
Measuring Tape
To ensure correct spacing between plants.
How Do You Remove Flossflower from the Soil?
How Do You Remove Flossflower from the Soil?
From Ground: First, irrigate the flossflower plant to moisten the soil. Next, excavate a wide trench around the plant using a shovel or spade, ensuring the plant's root ball remains intact. Carefully work the spade beneath the root ball to lift the plant from its original spot.From Pot: Water the flossflower plant and allow it to sit for a few minutes to loosen the soil. Gently invert the pot while supporting the plant's stem between your fingers. Carefully extract the plant from the pot, keeping the root ball undisturbed.From Seedling Tray: Water the flossflower seedlings, then wait until the soil is damp. Gently loosen the soil around the seedlings' roots using a small tool or your fingers. Carefully lift the seedlings from the tray with their roots intact.
Step-by-Step Guide for Transplanting Flossflower
Site Preparation
Prepare the planting location by clearing any weeds, debris, or rocks. Using a garden fork, loosen the soil to enhance air circulation and drainage.
Hole Digging
Excavate holes with the trowel that are larger and deeper than the flossflower's root system. Allow sufficient space between holes, based on the mature size of your flossflower.
Root Ball Placement
Gently position the flossflower in the hole, ensuring the root ball is level with the surrounding ground.
Backfilling
Refill the hole with soil, gently firming it around the root ball to eliminate air pockets. Avoid over-compacting the soil, as this can hinder root development.
Watering
Provide the flossflower with a thorough watering immediately after transplanting to help settle the soil and establish the roots.
Mulching
Apply a 2-3 inch layer of organic mulch around the base of the flossflower, leaving a small gap around the stems to prevent rot.
How Do You Care For Flossflower After Transplanting?
Water Requirements
Keep the soil around the flossflower consistently moist, but not waterlogged, for the initial weeks post-transplant to aid in developing strong roots.
Feeding
Apply a balanced, slow-release fertilizer around the flossflower a few weeks after transplanting to supply essential nutrients.
Weed Control
Regularly remove any weeds that emerge around the flossflower to prevent competition for nutrients and water.
Pruning
To encourage denser growth and more blooms, pinch back the tips of the flossflower once it reaches approximately 6 inches in height.
Troubleshooting Common Issues with Flossflower Transplantation.
When is the optimal time to transplant flossflower seedlings outdoors?
The ideal period to move flossflower outdoors is from early spring to late spring. These charming flowers thrive in the refreshing spring environment.
How do I choose the right spot for transplanting flossflower?
Flossflower prefers full sun or partial shade. Select a location that receives a minimum of 6 hours of daylight, ensuring it has well-drained soil.
What's the ideal spacing I should maintain when transplanting flossflower?
When transplanting flossflower, maintain a distance of 6-12 inches (15-30 cm) between each plant. This ensures ample room for growth and air circulation.
How can I prepare the soil prior to transplanting flossflower?
Before transplanting flossflower, enrich the soil with organic matter. Additionally, ensure proper drainage. This will help your plant thrive.
How to water flossflower after transplanting it?
Flossflower appreciates moist soil, but avoid water stagnation. Water them gently after transplanting and maintain consistent moisture without making the soil waterlogged.
What should I do if the transplanted flossflower shows signs of wilting?
Wilting could be due to water stress. Check soil moisture levels. If dry, water immediately. If waterlogged, improve drainage and reduce watering.
What should I do if there's yellowing on the flossflower leaves after transplanting?
Yellowing leaves might indicate overwatering or nutrient deficiency. Adjust your watering schedule and consider applying a balanced slow-release fertilizer.
Should I prune flossflower after transplanting?
Pruning isn't mandatory but pinching the tops of flossflower after transplanting encourages bushier growth and more blossoms.
How deep should I plant flossflower while transplanting?
While transplanting flossflower, plant it to the same depth as it was in its original container. This ensures the roots are well covered but not suffocated.
What might be causing slow growth in the transplanted flossflower?
Slow growth can be attributed to extreme temperatures, insufficient sunlight, or poor nutrition. Ensure your flossflower receives adequate light, warmth, and nutrients.


