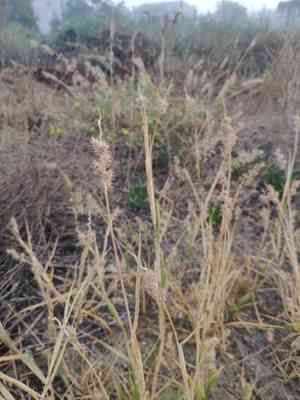
How to Transplant Mat sandbur?
The most favorable period for relocating mat sandbur spans from the latter part of spring through mid-summer, capitalizing on vigorous growth circumstances. Choose a sunny location with good drainage to guarantee mat sandbur flourishes. During the transfer of mat sandbur, careful manipulation is crucial for successful establishment.
Preparations Required Before Moving Mat Sandbur
Optimal Period for Relocating Mat Sandbur?
Moving mat sandbur during the prime period between late spring and early summer is ideal, allowing root establishment prior to intense heat. This timing enables mat sandbur to anchor more effectively, benefiting from mild days and moderate nights. It ensures delicate roots avoid summer's extreme heat or winter's cold, fostering a flourishing environment for mat sandbur. Additionally, transplanting in this season gives mat sandbur a head start for its annual blooming cycle, asserting its presence in your garden with elegance and vitality.
Recommended Spacing Between Mat Sandbur Plants?
To provide mat sandbur with ample room to flourish, aim to transplant them approximately 12 inches (30 cm) to 3 feet (91 cm) apart. This spacing ensures they have sufficient area to grow without competing for nutrients and sunlight.
Best Soil Mixture for Mat Sandbur Relocation?
Mat sandbur thrives best in soil that drains well. Before transplanting, incorporate some organic compost as a foundational fertilizer to enrich the soil and give your plants an excellent start.
Where to Replant Your Mat Sandbur?
Select a bright location that receives abundant daylight for your mat sandbur. They prefer sunshine, so a spot with full sun for most of the day would be perfect for optimal development.
Equipment Needed Before Mat Sandbur Transplantation
Gardening Gloves
To safeguard your hands while handling soil and plants.
Garden Trowel
For digging and transferring the plant to its new spot.
Watering Can
To hydrate the plant before and after its relocation.
Measuring Tape
To determine the correct distance between transplanted plants.
How to Extract Mat Sandbur from the Ground?
How to Extract Mat Sandbur from the Ground?
From Ground: First, moisten the mat sandbur plant by watering the soil. Then, using a garden trowel, dig a wide trench around the plant, leaving ample space to prevent damage to the root ball. Carefully work the trowel beneath the root ball to lift the plant from its original position.From Pot: Thoroughly water the mat sandbur plant to facilitate its removal. Tilt the pot sideways and gently tap its sides to loosen the soil and roots. Carefully ease the plant out, supporting it by its base and roots to prevent breakage.From Seedling Tray: Water the seedling tray to dampen the soil, which helps prevent root damage. Gently separate individual mat sandbur seedlings using a trowel or your fingers, ensuring as much of the root system remains intact as possible.
Step-by-Step Guide for Relocating Mat Sandbur
Preparation
Gather all necessary tools and thoroughly water the mat sandbur plant before beginning the transplanting process to minimize shock and soil erosion around the roots during the move.
Digging the Hole
Use a garden trowel to excavate a hole in the ground that is twice as wide and as deep as the root ball. This provides ample room for the roots to spread.
Transplanting
Carefully position the mat sandbur plant in the center of the hole. Ensure the top of the root ball is level with the surrounding ground to promote proper root growth and adequate support.
Filling the Hole
Backfill the hole with the original soil that was removed, gently tamping it down around the roots to eliminate air pockets without compacting the soil too tightly.
Watering
Immediately after planting, thoroughly water the mat sandbur to settle the soil around the roots and help alleviate some of the stress caused by transplanting.
Stabilization
If the mat sandbur plant is tall or in a windy area, you might need to provide support with a stake until the plant is established.
Post-Transplant Care for Mat Sandbur
Monitoring
Regularly inspect mat sandbur after transplanting for signs of water stress or sun scorching, adjusting care as needed.
Mulching
Apply a layer of organic mulch around the base of mat sandbur to help retain soil moisture and regulate soil temperature.
Pruning
Remove any damaged leaves or stems to help mat sandbur focus its energy on establishing its root system rather than repairing injured tissue.
Follow-Up Watering
Provide mat sandbur with consistent, light waterings to encourage deep root growth, avoiding overwatering or allowing the soil to completely dry out.
Resolving Common Issues with Mat Sandbur Transplantation.
When is the best time to move mat sandbur?
The ideal period is from late spring through midsummer, allowing the plant to settle before colder weather.
What spacing should I use for mat sandbur when transplanting?
Maintain a distance of 12 inches to 3 feet (30 cm to 91 cm) for healthy growth and air circulation.
What soil conditions benefit mat sandbur after transplanting?
Well-draining soil kept moderately moist will promote a successful mat sandbur transplant.
Why is my mat sandbur wilting after being moved?
Wilting may indicate shock or insufficient water. Keep the soil consistently moist, but not waterlogged, after transplanting.
What sunlight conditions does mat sandbur require after relocation?
Ensuring mat sandbur receives ample sunlight, ideally full sun, encourages vigorous growth post-transplant.
How do I know if mat sandbur is overwatered after transplant?
Signs of overwatering include yellowing leaves and a soggy soil base. Allow the top inch of soil to dry between waterings.
Can I fertilize mat sandbur immediately after transplanting?
Wait a few weeks post-transplant before fertilizing to allow mat sandbur to establish roots in its new environment.
How deep should I plant mat sandbur during transplant?
Transplant mat sandbur to the same depth it was in its previous location to prevent stem rot.
Is it normal for mat sandbur to appear droopy after transplanting?
A slight droop is normal as mat sandbur adjusts. Ensure adequate watering and initially avoid direct midday sun.
How can I protect my newly transplanted mat sandbur from pests?
Regularly inspect and maintain good plant hygiene to reduce pest attraction. Use appropriate pest control if necessary.


