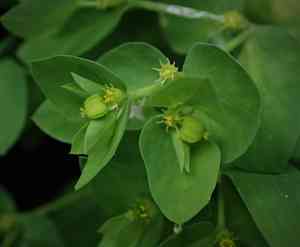
How to Transplant Petty spurge?
The most favorable time for transplanting petty spurge is during the revitalizing period of spring, which encourages strong development. Select a bright spot featuring soil that drains effectively. Gentle manipulation throughout the transfer protects fragile root structures, promoting sturdy integration.
What Preparations are Needed Before Transplanting Petty Spurge?
What is the Ideal Time for Transplanting Petty Spurge?
The optimal period to move petty spurge is during the revitalizing spring season, a time of growth and renewal. Relocating petty spurge at this point allows it to settle into the warming soil, benefiting from the longer days and moderate temperatures. This timing ensures the young petty spurge can flourish, with ample opportunity to mature and complete its life cycle before winter arrives. Rely on spring's natural rhythm to give your petty spurge the best start in its new home.
How Much Space Should You Leave Between Petty Spurge Plants?
When relocating petty spurge, ensure your planting holes are approximately 6-8 inches (15-20 cm) apart. This spacing will provide ample room for your plants to develop and thrive. It may seem generous, but petty spurge appreciates space to grow!
What is the Best Soil Mix for Petty Spurge Transplanting?
Prepare your soil type and foundational fertilizer for petty spurge. An enriched, well-draining soil, enhanced with compost or organic matter, is perfect. Incorporating a slow-release, granular fertilizer high in phosphorus will support its robust development.
Where Should You Relocate Your Petty Spurge?
Location is crucial! Select a spot where petty spurge can receive full to partial sun exposure. Petty spurge enjoys sunlight, but intense afternoon rays can be detrimental, so an area with morning sun or filtered light is ideal.
What Equipments Should You Prepare Before Transplantation Petty Spurge?
Gardening Gloves
To safeguard your hands while handling soil and the petty spurge plant.
Hand Trowel
The implement required to excavate holes for the plant.
Watering Can
It's crucial to thoroughly water the plant after planting to aid its establishment in the new location.
Garden Spade
You will need a spade for planting, especially if the plant is being moved from the ground.
Gardening Pruners
If the petty spurge is large, these will be necessary to reduce foliage and any damaged roots.
How Do You Remove Petty Spurge from the Soil?
How Do You Remove Petty Spurge from the Soil?
From Ground: Begin by gently loosening the soil around the petty spurge plant using a hand trowel, as younger petty spurge will have a less extensive root system. Once roots are visible, carefully work around them to prevent damage. Aim to keep the root ball as intact as possible.From Pot: For petty spurge plants in a container, turn it sideways, hold it gently, and tap the bottom of the pot until the plant slides out. Be careful not to pull the plant by its stems to avoid injury.From Seedling Tray: When the petty spurge plant is in a seedling tray, push up from the base to extract the plant from its cell, handling it by its leaves and not the stem to prevent unnecessary stress.
Step-by-Step Guide for Transplanting Petty Spurge
Digging
Excavate a hole using your garden spade, large enough to accommodate the root ball of your petty spurge plant. The depth should match the root ball's height, but be twice as wide.
Positioning
Place the petty spurge plant into the hole. Ensure the top of the root ball is level with the soil surface. Then, backfill the hole with soil, gently firming it around the root ball.
Watering
Once planted, water it thoroughly using your watering can. Saturate the area to ensure water reaches the roots, encouraging them to extend into the surrounding soil.
Mulching
Consider applying a layer of dried leaves, straw, or compost around the plant. This helps retain moisture and provides additional nutrients as it decomposes.
How Do You Care For Petty Spurge After Transplanting?
Monitoring
Keep a close watch on your petty spurge plant for at least several weeks following the transplant. This enables you to promptly address any indications of stress.
Maintenance Pruning
In the initial weeks after planting, pruning will help minimize water loss through evaporation and stimulate new growth.
Frequent Care
For the first few days post-transplant, make it a point to check on your petty spurge plant regularly to ensure it isn't showing any signs of distress. Remember to water consistently as recent transplants often require more moisture than established ones.
Relocation
If the petty spurge doesn't appear to be thriving in its new spot, do not hesitate to move it. It's better to relocate early on, rather than attempting to save a plant that isn't flourishing in its current position.
Troubleshooting Common Issues with Petty Spurge Transplantation.
When is the best time to transplant petty spurge?
The optimal period to transplant petty spurge is during its first to third growing season. The plant establishes better in cooler, less stressful conditions.
How far apart should I space petty spurge when transplanting?
When relocating petty spurge, maintain a distance of 6-8 inches (15-20 cm) between each plant. This provides sufficient room for growth and prevents overcrowding.
Why are the leaves of my transplanted petty spurge turning yellow?
Yellow foliage could indicate excessive watering or insufficient light. Adjust your watering schedule to meet petty spurge's needs, and try to position it in a location with adequate sunshine.
What should I do if the transplanted petty spurge wilts or droops?
If your petty spurge wilts after transplanting, don't be concerned. It's likely transplant shock. Keep the soil moist but avoid over-watering, and ensure it receives enough sunlight.
If the roots of petty spurge are tightly circled, should I disturb them when transplanting?
Absolutely. Gently untangle the roots before planting. This prevents 'root binding', allowing the roots of petty spurge to spread outward and establish more quickly.
Should I fertilize petty spurge immediately after transplanting?
Refrain from fertilizing right after transplant. Allow petty spurge a few weeks to acclimate to its new location before applying a balanced, slow-release fertilizer.
Is it essential to prune the petty spurge after transplanting?
Pruning is not immediately necessary after transplanting, but consider doing it to balance the root and leaf ratio. It would help the plant recover faster.
What can cause petty spurge transplant to fail?
Transplant failure can stem from various factors including an incorrect transplanting season, inadequate spacing, improper watering, and insufficient or excessive sunlight.
How much water does petty spurge need after transplanting?
Petty spurge requires thorough watering after transplanting. However, avoid a 'drowned plant' scenario. Ensure the soil is consistently moist but never waterlogged.
Should I move petty spurge into the full sun immediately after transplanting?
It's preferable to gradually introduce petty spurge to full sun. Abrupt changes can stress the plant, potentially leading to damage. Provide it with partial shade for the first few days after transplanting.


