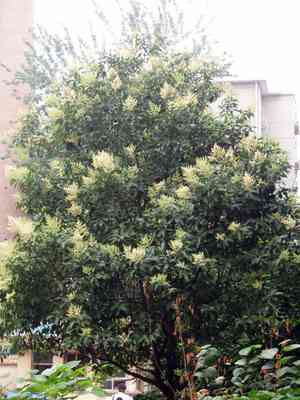
How to Transplant Glossy privet?
The optimal time to relocate glossy privet is from the beginning to the middle of spring, enabling the plant to firmly establish its root system prior to the onset of summer temperatures. For a successful transfer, select a site that offers good drainage and receives either partial or full sunlight. It is crucial to handle the root ball with care to minimize any strain on the plant.
What Preparations are Needed Before Transplanting Glossy Privet?
What is the Ideal Time for Transplanting Glossy Privet?
The optimal period for relocating glossy privet is from late winter's end to early spring's beginning. This early to mid-spring timeframe allows the plant ample opportunity to establish its root system. The cooler weather during this move minimizes stress on the plant, aiding in a successful transfer. Proper timing is crucial, giving glossy privet a head start for better adaptation.
How Much Space Should You Leave Between Glossy Privet Plants?
For your glossy privet, maintain a separation of approximately 30-40 feet (9-12 meters). This will ensure robust development and prevent overcrowding. Remember, providing adequate space is vital for proper plant growth!
What is the Best Soil Mix for Glossy Privet Transplanting?
For optimal outcomes, utilize a well-draining soil blend enriched with organic matter. Incorporating a slow-release, balanced base fertilizer will stimulate the growth of your glossy privet. Mix it in thoroughly while preparing the soil prior to transplanting.
Where Should You Relocate Your Glossy Privet?
Select a site with either full sun or partial shade for your glossy privet transplant. It flourishes under various light conditions, so any location receiving 4-6 hours of daily sunlight would be perfect. Happy gardening!
What Equipments Should You Prepare Before Transplantation Glossy Privet?
Garden shovel or spade
Used for loosening the soil and excavating the glossy privet plant.
Gardening Gloves
To safeguard your hands while handling soil and the plant.
Watering Can
Essential for hydrating the plant both before removal and after replanting.
Garden Cart or Wheelbarrow
For moving the glossy privet from its original spot to its new location.
Staking materials
If the glossy privet is a mature specimen, stakes and ties might be necessary to support it post-transplant.
How Do You Remove Glossy Privet from the Soil?
How Do You Remove Glossy Privet from the Soil?
From Ground: Start by watering the glossy privet plant to moisten the soil, which facilitates easier digging. Using a garden shovel or spade, dig a wide and deep circle around the plant, ensuring you stay clear of the main root ball to prevent damage. Once this is done, carefully work the spade beneath the root ball to loosen it, then gently lift the plant from the ground.From Pot: Begin as usual by watering the glossy privet plant. Afterward, tilt the pot sideways and, while supporting the plant's base, gently tap the pot's edge until the plant, along with its root ball, slides out. Avoid pulling the plant, as this can cause harm.From Seedling Tray: If the glossy privet plant is a seedling, water the tray, then cautiously tip it on its side. The young seedlings should slide out easily; handle them by their leaves to prevent damage to their stem or roots.
Step-by-Step Guide for Transplanting Glossy Privet
Preparation
Once the glossy privet plant has been extracted from its initial position, transport it to the new site using a garden cart or wheelbarrow to prevent plant damage.
Digging
At the new location, excavate a hole that is twice the size of the root ball to ensure ample space.
Placing
Position the glossy privet plant in the hole, making sure the top of the root ball is level with the soil surface.
Filling
Backfill the hole with the excavated soil and firm the soil around the base of the glossy privet to secure it.
Watering
Thoroughly water the glossy privet immediately after transplanting.
How Do You Care For Glossy Privet After Transplanting?
Water frequency
During the initial weeks following transplanting, it's crucial to regularly water the glossy privet plant to aid in root establishment.
Pruning
It can be beneficial to prune the glossy privet plant after transplanting to reduce water loss through its leaves and direct plant growth towards root development.
Staking
If the glossy privet plant is large or situated in an exposed area, consider staking it to provide additional support and prevent it from falling over.
Monitoring
Observe the glossy privet closely, especially during the first few weeks post-transplant. Any wilting or discolored leaves may signal stress. If such indications appear, adjust watering and inspect the planting hole for proper drainage.
Troubleshooting Common Issues with Glossy Privet Transplantation.
When is the best time to transplant glossy privet?
The ideal period to relocate glossy privet is during the early to mid-stages of spring. This timeframe best supports growth and helps it adapt to its new environment.
How should I space glossy privet during transplanting?
Provide each glossy privet with sufficient room to flourish. Optimal spacing would be approximately 30-40 feet (9-12 meters) apart. This improves air circulation and promotes better health.
Can I transplant glossy privet from a pot to the ground?
Certainly! To achieve this, ensure your glossy privet possesses a solid root ball. Carefully extract it from the pot, keeping the root ball intact, and place it in the prepared ground area.
Should I prune glossy privet before transplanting?
Yes, light pruning encourages a healthy transplant. However, severe pruning can stress the plant. Only remove damaged or excessively long branches before transplanting glossy privet.
What type of soil should I use for glossy privet transplanting?
Glossy privet can tolerate various soil types. However, for optimal growth, plant it in well-drained soil enriched with organic matter. It would thrive in such conditions!
Should I water glossy privet immediately after transplanting?
Absolutely! Watering glossy privet promptly after transplanting helps its roots settle into their new surroundings and mitigates transplant shock. Just avoid overwatering the roots.
What if the transplanted glossy privet shows signs of wilting?
Wilting after transplanting can indicate transplant shock. Ensure adequate watering, avoid extreme temperatures, and provide indirect sunlight until glossy privet acclimates to its new environment.
Can I use fertilizer immediately after transplanting glossy privet?
While glossy privet might benefit from a nutrient boost post-transplant, it's advisable to wait about 2-4 weeks before applying a slow-release, balanced fertilizer. Applying too soon can cause root burn.
How deep should the transplant hole for glossy privet be?
You'll want to dig a hole that is 2-3 times the width, and the same depth, as the root ball of your glossy privet. This allows ample space for roots to spread.
How can I help glossy privet survive the winter after transplanting?
Glossy privet is resilient, but to ensure its winter survival, apply a layer of mulch around the plant's base in late fall. This provides insulation and helps retain soil moisture.


