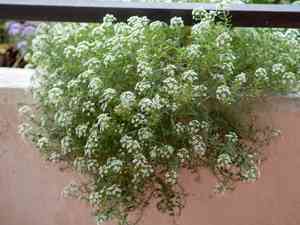
How to Transplant Sweet alyssum?
The ideal period for relocating sweet alyssum is after the danger of frost has subsided, generally in the initial weeks of spring. Select a site that receives ample sunlight to some shade and possesses soil with good drainage. Carefully separate the roots if they are densely packed, to encourage robust development following the move.
What Preparations are Necessary Before Relocating Sweet Alyssum?
When is the Optimal Time for Moving Sweet Alyssum?
The best period to move sweet alyssum is at the onset of spring. This timing allows sweet alyssum to comfortably settle into its new environment before the peak summer heat. Transplanting sweet alyssum at this point enhances its hardiness and promotes abundant growth, boosting your garden's appeal. Remember, sweet alyssum requires a favorable setting to flourish densely and vibrantly.
How Much Space Should Be Allotted Between Sweet Alyssum Plants?
When relocating sweet alyssum, provide ample room for the young plants to expand by positioning them 8-12 inches (20-30 cm) apart from one another.
What is the Best Soil Mixture for Sweet Alyssum Relocation?
For sweet alyssum, prepare a soil blend that drains effectively. Incorporate compost or aged manure into the soil to enhance its richness. Additionally, add a foundational fertilizer such as 10-10-10 or 14-14-14 for optimal development.
Where Should You Replant Your Sweet Alyssum?
Select a garden spot for sweet alyssum that receives either full sun or partial shade. Ensure it gets at least 6 hours of sunlight daily, as sweet alyssum thrives in bright, sunny locations, and this exposure will encourage more blossoms.
What Tools Should You Prepare Before Moving Sweet Alyssum?
Gardening Gloves
To safeguard your hands while handling soil and plants.
Shovel or Spade
To excavate the hole for replanting and extract the sweet alyssum plant from its initial spot.
Pruner or Scissors
To trim any damaged or dead foliage and stems from the sweet alyssum prior to relocation.
Watering Can or Hose
To hydrate the plants at various stages of the relocation process.
Trowel
To assist with digging and placing the sweet alyssum plant in its new position.
Organic Compost or Fertilizer
To enrich the soil in the planting hole and foster robust growth.
How Do You Extract Sweet Alyssum from the Soil?
How Do You Extract Sweet Alyssum from the Soil?
From Ground: First, water the sweet alyssum plant to moisten the soil. Then, dig a wide trench around the plant using a shovel or spade, ensuring the plant's root ball remains intact. Carefully work the spade beneath the root ball to lift the plant from its original location.From Pot: Water the sweet alyssum plant in the pot to help loosen the soil. Turn the pot on its side, and gently tap the bottom and sides of the pot until the plant slides out with the root ball intact.From Seedling Tray: Water the sweet alyssum seedlings in the tray, and use a small trowel or your fingers to carefully loosen the soil and roots around each plant. Gently lift the seedlings out of the tray by their leaves, keeping the root ball intact.
Step-by-Step Guide for Relocating Sweet Alyssum
Excavating the Hole
Use a shovel or spade to dig a hole that is sufficiently deep and wide to accommodate the root ball of the sweet alyssum plant. The hole should be slightly deeper and wider than the root ball to allow for proper root development.
Preparing the Cavity
Add a generous quantity of organic compost or fertilizer to the base of the hole and mix it with the existing soil to enrich the planting area.
Positioning the Plant
Carefully place the sweet alyssum plant in the prepared hole, ensuring the root ball is centered and level with the surrounding soil.
Backfilling the Hole
Gently fill the hole with the amended soil, ensuring the root ball is completely covered and the plant sits at the same depth as it was in its initial spot.
Hydrating
Thoroughly water the sweet alyssum plant after relocation to settle the soil and help establish good root contact with the surrounding soil.
Mulching
Apply a layer of organic mulch around the base of the plant to help retain moisture and regulate soil temperature.
How Do You Care For Sweet Alyssum After Relocation?
Watering
Keep the soil around the sweet alyssum plant consistently moist, but not waterlogged, for the initial few weeks after relocation to help establish robust roots.
Pruning
Regularly trim any dead or damaged leaves and stems to encourage new growth and maintain the plant's overall vitality and appearance.
Monitoring
Keep a close watch on the sweet alyssum for any indications of stress, such as wilting foliage or discoloration, and adjust care as needed.
Pests and Diseases
Inspect the plant regularly for any pests or diseases and treat appropriately with organic or chemical solutions as required.
Fertilizing
Apply a balanced fertilizer once the sweet alyssum plant has settled and begins to show new growth. Follow package directions for correct application and dosage.
Addressing Common Issues with Sweet Alyssum Relocation.
When is the best time to relocate sweet alyssum?
The ideal relocation time for sweet alyssum is in early spring, after the threat of frost has passed.
What spacing should I maintain between each sweet alyssum during relocation?
Always maintain adequate distance between each sweet alyssum during relocation. Ideally, around 8-12 inches (20-30 cm).
What should I do if the relocated sweet alyssum doesn't thrive?
Ensure the sweet alyssum receives sufficient sunlight, nutrients, and water. If problems persist, consider consulting an expert.
What soil type is most suitable for relocating sweet alyssum?
Sweet alyssum prefers well-draining soil. If your soil is dense or sandy, enriching it with compost can make it more appropriate.
Why are the leaves of my relocated sweet alyssum turning yellow?
Yellow leaves often signal overwatering or nutrient deficiency. Adjust your care routine; also, check for pests if necessary.
How should I care for sweet alyssum immediately after relocation?
Water your sweet alyssum immediately after relocation but avoid saturating. Also, prevent the soil from drying out for the first few weeks.
Can I relocate sweet alyssum in a pot indoors?
Yes, sweet alyssum can be relocated indoors in pots. Just ensure it receives ample sunlight and the pot has proper drainage.
Why are the flowers on my relocated sweet alyssum not blooming?
This could be due to insufficient sunlight, lack of nutrients, or improper watering. Ensure sweet alyssum receives all three in moderation.
How deep should I dig for relocating sweet alyssum?
Dig a hole as deep as the sweet alyssum's root ball. Position the plant so it sits level with the soil surface.
What temperature range is ideal for relocating sweet alyssum?
Sweet alyssum prefers cooler weather; ideally, temperatures should not exceed 75 degrees Fahrenheit (24 degrees Celsius) for optimal blooming.


