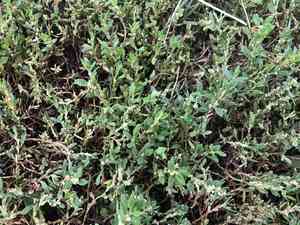
How to Transplant Prostrate knotweed?
The most opportune period for relocating prostrate knotweed is during the spring, owing to the conducive environmental factors that arise. Select a brightly lit spot featuring soil that drains effectively. Typically, no particular advice for transplanting is necessary, as prostrate knotweed adjusts with ease.
What Preparations are Needed Before Transplanting Prostrate Knotweed?
What is the Ideal Time for Transplanting Prostrate Knotweed?
The optimal period for relocating prostrate knotweed is during its spring revival. This aligns with the plant's natural cycle, boosting its adaptability and resilience. By selecting this green onset of the growing season, you provide prostrate knotweed a strong base for developing a robust root system before the summer heat. This not only improves survival rates but also encourages vigorous growth, ensuring a lush and healthy plant. Harmonizing with nature's rhythm at this time ensures a smooth transition for prostrate knotweed, guaranteeing its best start in a new spot.
How Much Space Should You Leave Between Prostrate Knotweed Plants?
Begin by ensuring prostrate knotweed has ample room to expand. Position individual plants approximately 1-2 feet (30-60 cm) apart. This helps prevent overcrowding and encourages healthier development.
What is the Best Soil Mix for Prostrate Knotweed Transplanting?
Before planting prostrate knotweed, prepare well-draining soil and mix it with a foundational fertilizer. This will help nourish prostrate knotweed and significantly enhance its growth.
Where Should You Relocate Your Prostrate Knotweed?
Select a site that receives full to partial sun daily, as prostrate knotweed thrives in sunlight. The correct location will ensure prostrate knotweed's health and productivity, so be sure to choose one with optimal sun exposure!
What Equipments Should You Prepare Before Transplantation Prostrate Knotweed?
Gardening Gloves
To safeguard your hands while handling the plant and soil.
A Trowel
Useful for excavating the plant while preserving its root structure.
A Spade or Shovel
Depending on the size of the prostrate knotweed, a larger tool might be necessary to help lift the plant from its original spot.
A Garden Fork
To loosen the soil in the new planting area.
Pruning Shears
To trim any dead or damaged leaves or stems both before and after transplanting.
Watering Can
To gently hydrate prostrate knotweed before and after the transplanting process.
Wheelbarrow or Garden Cart
Helpful for moving prostrate knotweed if it is large.
How Do You Remove Prostrate Knotweed from the Soil?
How Do You Remove Prostrate Knotweed from the Soil?
From Ground: First, water prostrate knotweed sufficiently to moisten the soil. Using your spade or shovel, dig a wide trench around the plant, making sure to keep the root structure intact. Be careful as you work the tool beneath the root ball to lift the plant from its original location. The aim is to keep as many roots undamaged as possible, as this will improve prostrate knotweed's chances of survival after transplanting.From Pot: Water prostrate knotweed thoroughly, then turn the pot sideways while gently holding your hand over the soil with the plant's stem between your fingers. Tap the pot's rim on a firm surface like a table or the ground and slide prostrate knotweed out. Ensure you support the plant from its base to prevent damage.From Seedling Tray: Water the seedlings first to facilitate their removal. Afterward, push up from the bottom of each cell or gently pull on the leaves to lift out the seedling. If the seedling resists, use a spoon or butter knife to lever it out, being careful not to harm the roots or stem.
Step-by-Step Guide for Transplanting Prostrate Knotweed
Plant Removal
Follow the removal instructions based on where your prostrate knotweed is currently situated. It is crucial to keep the plant's root structure as intact as possible during this procedure.
Prepare the New Spot
Use your garden fork to loosen the soil at your chosen new site. The hole should be deep enough to accommodate prostrate knotweed's root system.
Place the Plant
Position prostrate knotweed in the hole. Ensure the top of the root ball is level with or slightly below ground level.
Fill the Hole
Backfill the hole, gently firming the soil around the base of prostrate knotweed.
Water Thoroughly
After transplanting, water prostrate knotweed generously. This will help settle the soil and provide your plant with much-needed hydration to recover from the stress of relocation.
How Do You Care For Prostrate Knotweed After Transplanting?
Monitoring
Observe your prostrate knotweed for several weeks post-transplant. Look for indications of transplant shock such as leaf drop, wilting, or changes in leaf coloration.
Watering
For the initial weeks after transplanting, keep the soil consistently moist, but ensure it is not overly saturated or waterlogged.
Pruning
Use your pruning shears to remove any dead or dying leaves or branches. This will help prostrate knotweed direct its energy towards establishing its roots in its new location.
Weather
If feasible, transplant on a cool, overcast day to minimize plant stress. Subsequent days should ideally have similar weather, or ensure the plant has some shade if a heatwave suddenly occurs. Remember to maintain a friendly and supportive tone as this guide is targeted at novice gardeners.
Troubleshooting Common Issues with Prostrate Knotweed Transplantation.
When is the best time to transplant prostrate knotweed?
The optimal period to transplant prostrate knotweed is during seasons 1 to 3. These seasons offer the best growing conditions for prostrate knotweed.
What is the recommended spacing for prostrate knotweed during transplantation?
For ideal growth, ensure prostrate knotweed plants are spaced 1-2 feet (30-60 cm) apart. This will also aid air circulation and nutrient absorption.
How deeply should prostrate knotweed be planted?
Aim to plant prostrate knotweed at the same soil level it was previously growing. This helps the plant maintain its original growth habits.
What are the ideal soil conditions for transplanting prostrate knotweed?
Prostrate knotweed plants adapt well to various soil conditions. However, well-draining soil rich in organic matter will encourage healthier development.
What should be done if the prostrate knotweed plant wilts after transplantation?
If prostrate knotweed wilts after transplantation, ensure it is thoroughly watered. Also, temporarily shield it from direct sunlight until the plant stabilizes.
How should I prepare the transplant hole for prostrate knotweed?
Prepare a hole twice the size of the root ball. Loosen the soil at the bottom to help the roots spread easily.
What kind of care is required for prostrate knotweed immediately after transplantation?
Post-transplant, maintain consistent watering and keep prostrate knotweed in partial shade for a few days. This reduces transplant shock and helps the plant establish more readily.
Why are my prostrate knotweed plants looking yellow after transplantation?
Yellowing might indicate overwatering or a lack of nutrients. Check the soil's moisture levels and consider testing soil nutrient content if the issue persists.
How to protect prostrate knotweed from common pests and diseases post-transplantation?
Control pests and diseases by maintaining proper spacing and cleanliness. Apply eco-friendly pesticides if necessary. Regularly inspect prostrate knotweed for any early signs of infestations.
How is the first year care different for prostrate knotweed plants after transplantation?
During the first year, prostrate knotweed may require more attention: consistent watering until established, weed management, and protection from extreme weather conditions will be vital.


