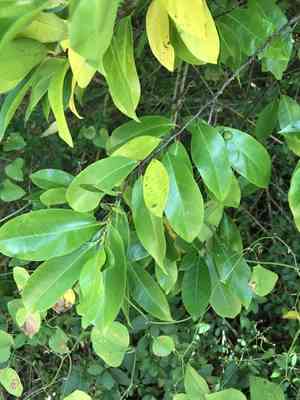
How to Transplant Carolina cherry laurel?
For carolina cherry laurel, the prime period for relocation success coincides with the warmth from late spring to mid-summer, facilitating strong root development. Select a site offering filtered light and soil that drains effectively to encourage healthy proliferation.
What Preparations are Needed Before Transplanting Carolina Cherry Laurel?
What is the Ideal Time for Transplanting Carolina Cherry Laurel?
The optimal period for relocating carolina cherry laurel is during the warmer embrace of late spring to early summer. This timeframe allows the soil to be receptive to root establishment, ensuring a smooth transition for carolina cherry laurel. The mild weather of this season promotes root development, leading to vigorous growth. During these prime months, your carolina cherry laurel will have ample opportunity to settle in before the colder autumn. It's the perfect chance for carolina cherry laurel to flourish and become a lush, green addition to any area.
How Much Space Should You Leave Between Carolina Cherry Laurel Plants?
Firstly, your carolina cherry laurel will require ample room to expand. A good guideline is to position each plant approximately 8-10 feet (2.4-3 meters) apart. This provides each plant with sufficient space to spread out!
What is the Best Soil Mix for Carolina Cherry Laurel Transplanting?
For your carolina cherry laurel, a well-draining soil enriched with organic matter is most suitable. Consider incorporating compost or well-rotted manure into your soil, along with a slow-release base fertilizer to provide a nutrient boost.
Where Should You Relocate Your Carolina Cherry Laurel?
Regarding its placement, your carolina cherry laurel would thrive in a sunny or partially shaded spot in your garden. While it can endure some shade, a good amount of sunlight will aid its growth.
What Equipments Should You Prepare Before Transplantation Carolina Cherry Laurel?
Shovel or Spade
To excavate the root ball of carolina cherry laurel from its original position.
Garden Hose with a Spray Nozzle or Watering Can
To moisten the ground prior to digging and to water after relocation.
Wheelbarrow or large container
To move the plant from its current spot to the new location.
Gardening Gloves
To safeguard your hands while handling the plant and soil.
Pruning Shear
For trimming any dead or damaged roots or branches.
Mulch
To conserve soil moisture and assist roots in establishing after planting.
How Do You Remove Carolina Cherry Laurel from the Soil?
How Do You Remove Carolina Cherry Laurel from the Soil?
From Ground: First, thoroughly saturate the soil around carolina cherry laurel to facilitate digging and reduce plant stress. Next, use a shovel or spade to create a trench around the plant, ensuring you dig deep enough to get beneath the root ball. Carefully work the spade under the root ball and begin to lift the plant from the ground. If the roots are extensive and deep, deeper digging or additional tools may be necessary. Once the plant and its root system are detached from the ground, transfer the plant to its new location using your wheelbarrow or large container.From Pot: Begin by watering the soil in the pot, which will help carolina cherry laurel slide out more easily. Carefully turn the pot on its side, supporting the plant at its base with one hand, and gently slide it out of the pot. Avoid pulling the plant as this can cause root damage. After the plant is free from the pot, inspect the roots. If they are tightly coiled around the inside of the pot (a condition known as being 'root-bound'), use your hands or clean pruning shears to gently separate the roots.From Seedling Tray: To extract a carolina cherry laurel seedling from its tray, start by watering the tray – this makes the plant easier to remove. Gently hold the top of the soil with a couple of fingers to support the seedling, invert the tray and tap it on the edge to loosen the soil and roots. Be gentle as seedlings are very delicate at this stage.
Step-by-Step Guide for Transplanting Carolina Cherry Laurel
Preparation
Inspect the new site to confirm it is ready for your carolina cherry laurel. It should be spacious enough to accommodate the plant's mature size and free of any rocks or debris that could hinder root growth.
Digging
Excavate a hole that is at least twice the width of the root ball but no deeper than its height. This allows the roots to spread out and become established.
Inserting
Position your carolina cherry laurel in the center of the hole. Backfill the hole with soil and gently press it down to eliminate air pockets. Ensure the plant is not placed deeper than it was in its original spot.
Watering
Thoroughly water the plant after transplanting to settle the soil. Providing ample water is crucial to hydrate carolina cherry laurel and help it establish in its new home.
Mulching
Apply a layer of mulch around the base of carolina cherry laurel (without touching the trunk) to help retain soil moisture and prevent weed growth.
How Do You Care For Carolina Cherry Laurel After Transplanting?
Watering
Consistent but moderate watering is vital for a newly transplanted carolina cherry laurel, especially during the initial weeks. Monitor the soil's moisture level, ensuring it remains uniformly moist but not waterlogged.
Checking
Observe carolina cherry laurel closely during the first few weeks post-transplant. Look for signs of stress such as yellowing leaves or wilting, which could indicate a watering issue or potential disease.
Troubleshooting Common Issues with Carolina Cherry Laurel Transplantation.
When's the best time to transplant carolina cherry laurel?
Relocate carolina cherry laurel from late summer to early fall, ideally between the third and fifth season for optimal results!
What distance should be maintained between two carolina cherry laurel while transplanting?
Ensure at least 8-10 feet (2.4-3 m) of space between each carolina cherry laurel to allow for adequate growth.
What to do if my transplanted carolina cherry laurel isn't growing well?
If your carolina cherry laurel isn't thriving, consider the soil type or pH. It prefers well-drained, acidic soil.
How can I ensure my successfully transplanted carolina cherry laurel not getting withered?
Regular watering is essential! Keep the soil moderately moist, but avoid overwatering carolina cherry laurel, as it dislikes waterlogged conditions.
What to do if the leaves of my transplanted carolina cherry laurel are turning yellow?
Yellow leaves can indicate overwatering. Reduce the amount of water and ensure the soil drains properly.
Can my carolina cherry laurel survive if I mistakenly transplanted in the wrong season?
While carolina cherry laurel prefers to be transplanted between the third and fifth season, it's resilient and can adapt to other seasons with additional care.
Why are the leaves on my transplanted carolina cherry laurel dropping off?
Leaf drop could be due to an abrupt change in conditions. Maintain consistent temperature and light in the transplant area.
What would be the ideal depth to plant carolina cherry laurel?
Plant carolina cherry laurel at the same depth it was previously growing, typically around 10 inches (25 cm) deep.
Can I use a fertilizer while transplanting carolina cherry laurel?
Yes, you can! Use a slow-release fertilizer, preferably one formulated for acid-loving plants.
How can I protect my transplanted carolina cherry laurel from pests and diseases?
Frequent inspections are crucial. If you notice pests or signs of disease, use an appropriate pesticide or fungicide, ensuring it's safe for carolina cherry laurel.


