How to Transplant Scarlet sage?
The ideal period for relocating scarlet sage is throughout the balmy, bright days of early to late summer, which offers prime conditions for development. To ensure success, select a sunny spot with good drainage, and carefully untangle the roots prior to moving, if necessary.
What Preparations are Needed Before Transplanting Scarlet Sage?
What is the Ideal Time for Transplanting Scarlet Sage?
Relocating scarlet sage between the start of summer and its peak season is optimal, as this aligns with its natural growth cycle. Transplanting scarlet sage during this period helps establish a robust root system, leading to more vigorous blooms. For the best outcome, transplant scarlet sage in early to late summer!
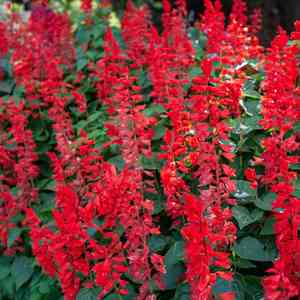
How Much Space Should You Leave Between Scarlet Sage Plants?
When transplanting scarlet sage, ensure adequate spacing between individual plants to foster healthy development. Aim for a distance of 12-18 inches (30-45 cm) apart, which is the perfect gap for this beautiful plant.
What is the Best Soil Mix for Scarlet Sage Transplanting?
To give scarlet sage the best possible start, prepare the soil using a well-draining, fertile, loamy mixture. Incorporate a balanced, slow-release fertilizer to support its growth and development throughout the season.
Where Should You Relocate Your Scarlet Sage?
For a successful transplant, scarlet sage thrives in a sunny location with ample light. Select a spot that receives at least 6 hours of direct sunlight daily. While partial shade is acceptable, full sun produces the most favorable results.
What Equipments Should You Prepare Before Transplantation Scarlet Sage?
Gardening Gloves
To safeguard your hands while handling soil and plants.
Garden Trowel
For comfortably excavating holes at the new site.
Gardening Fork
Useful for loosening the soil around the scarlet sage when removing it from its original spot.
Watering Can
To irrigate the plant immediately after relocation.
Secateurs
Required for trimming any damaged roots or stems prior to transplanting.
Garden Sieve
To eliminate any excess soil from the root ball.
Gardening Spade
To lift larger specimens from their initial location.
Garden Compost
To enrich the new planting site and encourage rapid growth of scarlet sage.
How Do You Remove Scarlet Sage from the Soil?
How Do You Remove Scarlet Sage from the Soil?
From Ground: If scarlet sage is currently in the ground, start by thoroughly watering it to moisten the soil around its roots. Use a garden fork to gently loosen the soil surrounding the plant's root ball, maintaining a safe distance to avoid root damage. Once the soil is loose, carefully lift the plant from its original position.From Pot: Water the pot thoroughly and let it sit for a few minutes. Then, carefully invert the pot while supporting the base of the scarlet sage, allowing it to slide out easily. Be cautious not to pull the plant, as this can harm the roots. If the plant doesn't come out, it might be root-bound, and you may need to gently tap the pot's rim on a hard surface to dislodge it.From Seedling Tray: Water the seedling tray and allow it to soak. Slide your fingers along the sides of the individual cell, then gently push the scarlet sage from below. Always handle the seedling by its leaves to prevent stem damage.
Step-by-Step Guide for Transplanting Scarlet Sage
Digging
Begin by digging a hole with the garden trowel that is twice as wide and deep as the scarlet sage's root ball. Form a mound of soil at the bottom of the hole for your plant to rest upon.
Prepare the Plant
Use the garden fork and sieve to gently remove any surplus soil from the scarlet sage's roots. Next, prune any damaged roots or stems using the secateurs. This promotes new, healthy growth after the transplant.
Planting
Position the scarlet sage on the mound in the hole, ensuring the top of the root ball is level with the soil surface. Backfill the hole with soil, gently firming it around the roots.
Watering
After planting, water the scarlet sage thoroughly using the watering can. This helps the soil settle around the roots and minimizes transplant shock.
How Do You Care For Scarlet Sage After Transplanting?
Watering Schedule
Always keep the soil around the scarlet sage consistently moist in the weeks following transplanting, but avoid overwatering to prevent root rot.
Pruning
Encourage denser growth by pinching back the scarlet sage approximately 2-3 weeks after transplanting. This prompts it to direct more energy towards root establishment.
Guarding
Shield the scarlet sage from strong winds and harsh weather for a few weeks post-transplant, until it has established its new root system and is thriving in its new location.
Monitoring
Closely observe the scarlet sage for any indications of stress or disease. Early detection of issues can be vital for the plant's survival and well-being.
Troubleshooting Common Issues with Scarlet Sage Transplantation.
When is the best time to transplant scarlet sage?
The optimal period for transplanting scarlet sage spans from the beginning to the end of summer. This offers ideal growing conditions for the plant.
What's the ideal transplant spacing for scarlet sage?
Scarlet sage plants should ideally be positioned with a distance of 12-18 inches (30-45 cm) between them. This provides ample room for growth without overcrowding.
Why is my scarlet sage wilting after transplanting?
Scarlet sage may wilt due to transplant shock, often caused by root damage or abrupt changes in light, temperature, or humidity. Gradually acclimate your plant to its new environment to reduce this risk.
What kind of soil mix is best for transplanting scarlet sage?
Scarlet sage requires well-drained soil enriched with organic matter. The soil pH should ideally be slightly acidic to neutral. Avoid overly compacted soil that could hinder root development.
How frequently should I water scarlet sage after transplanting?
Initially, water scarlet sage thoroughly once the transplant is complete. Afterward, water it when the top inch of soil feels dry. Excessive watering can lead to root rot.
Why are the leaves of my scarlet sage turning yellow after transplanting?
Yellowing leaves could signal overwatering, underwatering, or a nutrient deficiency. Check the soil moisture levels and consider a balanced fertilizer to address potential nutrient needs.
Should I prune scarlet sage when transplanting it?
Pruning isn't strictly necessary during transplantation, but remove any dead or diseased growth to promote the health and vigor of your scarlet sage.
How should I prepare scarlet sage for transplantation?
Water your scarlet sage a day in advance to facilitate root extraction. Choose a suitable spot and prepare the soil before commencing the transplantation process.
How deep should I plant scarlet sage when transplanting?
When transplanting, place scarlet sage at the same depth it was previously growing. Planting too deep can cause stem rot, while too shallow can expose roots.
Can I transplant scarlet sage in pots?
Absolutely! Ensure the pot is sufficiently large and has proper drainage. Keep in mind that watering frequency might increase, as potted scarlet sage tends to dry out more quickly.


