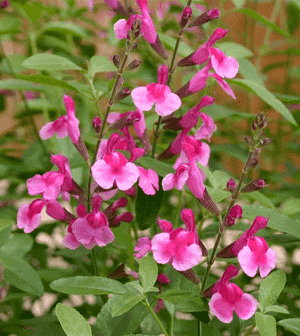
How to Transplant Autumn sage?
The ideal period for relocating Salvia greggii is between early and mid-spring, coinciding with the plant's emergence from dormancy. This resilient perennial thrives in sun-drenched locations with soil that drains effectively, which encourages prolific flowering. Carefully untangle the root ball prior to transplanting and guarantee adequate distance between plants to foster vigorous development.
Essential Preparations Before Relocating Autumn Sage
Optimal Timing for Autumn Sage Relocation
Move your autumn sage during the active growth period of early to mid-spring, which is ideal for this task. This timeframe provides autumn sage with warmer soil post-winter and extended daylight, allowing for strong root development before summer. Establishing it then promotes its growth, leading to a lush, vibrant specimen. Each step ensures successful replanting and aids the plant's adjustment to its new setting. Remember, precise information improves your transplanting results!
Recommended Spacing Between Autumn Sage Plants
For autumn sage, we suggest providing ample room for growth by spacing them 12-24 inches (30-60 cm) apart. This ensures sufficient space for root expansion and air circulation.
Ideal Soil Mixture for Autumn Sage Transplanting
Prepare a well-draining soil blend featuring loam, sand, and compost for autumn sage. Incorporate a slow-release, balanced fertilizer, such as 10-10-10, during soil preparation to ensure excellent initial growth and vitality.
Selecting the New Location for Your Autumn Sage
Choose a sunny spot for relocating autumn sage, as it thrives in full sunlight. A site receiving at least 6-8 hours of direct sun daily will help your plant flourish and produce abundant blooms.
Tools Required Before Transplanting Autumn Sage
Gardening Gloves
To safeguard your hands while handling soil and the plant.
Shovel or Spade
For excavating the new planting site and assisting with plant removal.
Pruner or Small Scissors
To trim any damaged roots or stems.
Trowel
For more precise digging or adjusting soil within the hole.
Watering Can or Hose
To supply water before, during, and after the transplanting process.
Organic Compost
To blend with existing soil, enriching it with nutrients and enhancing drainage.
Mulch
To help maintain soil moisture and inhibit weed growth around the plant.
How to Extract Autumn Sage from its Current Location
How to Extract Autumn Sage from its Current Location
From Ground: First, hydrate the autumn sage plant to moisten the soil, facilitating easier digging and reducing plant stress. Next, excavate a wide trench around the plant using a shovel or spade, ensuring the plant's root ball remains intact. Carefully work the spade beneath the root ball to lift the plant from its original spot.From Pot: Water the autumn sage plant and allow approximately 30 minutes for the moisture to absorb. Turn the pot on its side, gently tapping the sides and bottom to loosen the soil and root ball. Carefully slide the plant out of the pot while supporting the root ball, taking care not to harm the roots.From Seedling Tray: Thoroughly water the autumn sage seedlings in the tray. Use a small trowel to gently loosen the soil around each seedling by pushing down and lifting the seedling out. Be sure not to pull on the stem, as this may cause damage. Hold the seedling by the root ball or a leaf when lifting.
Step-by-Step Guide for Relocating Autumn Sage
Location Selection
Select a site with adequate sunlight and space for your autumn sage plant to reach its mature dimensions.
Soil Preparation
Dig a hole in the chosen spot that is roughly twice the size of the plant's root ball. Mix equal parts of native soil and organic compost for backfilling.
Root Examination
Use pruner or small scissors to remove any damaged or dead roots, ensuring the remaining roots are healthy and ready for establishment.
Plant Positioning
Hold the autumn sage plant in the hole, making sure the top of the root ball is level with the ground. The plant should not be placed too deep or too shallow, so adjust the hole's depth if necessary.
Backfill the Hole
Scoop the soil and compost mixture back into the hole around the root ball, gently firming the soil to eliminate air pockets without excessive compaction.
Watering
Water the autumn sage plant generously after transplanting, providing sufficient moisture for the roots to establish.
Mulching
Apply a 2-3 inch layer of mulch around the plant's base, ensuring it does not touch the stem, to help retain soil moisture and prevent weed growth.
Post-Transplant Care for Autumn Sage
Watering
Maintain consistent moisture in the soil around the autumn sage, avoiding sogginess, for the initial weeks after transplanting to aid in strong root development.
Pruning
Encourage denser growth by pinching back new shoots after transplanting, and trim any dead or damaged stems.
Fertilizing
After the first few weeks, apply a slow-release fertilizer sparingly to boost growth, following the product's instructions for your specific plant.
Monitoring
Keep a close watch on the autumn sage plant, looking for any signs of stress or disease, and address them promptly with appropriate care.
Addressing Common Issues with Autumn Sage Transplantation.
When is the optimal time to transplant autumn sage?
The best period to move autumn sage is from early spring through mid-spring. This season offers ideal conditions for roots to become established in their new environment.
What is the recommended spacing for autumn sage?
For autumn sage, aim for a spacing of 12-24 inches (30-60 cm). This provides each plant ample room to grow and prevents overcrowding.
How to prepare the new site for autumn sage transplanting?
Before relocating autumn sage, ensure the new site has well-draining soil, a slightly acidic pH, and receives full to partial sun. Make the hole twice as wide as the root ball.
I've transplanted autumn sage, but its leaves are wilting. What should I do?
Post-transplant shock can cause leaf wilting. Keep the soil consistently moist, but not waterlogged, and shield it from intense sunlight for a few days to aid recovery.
How to transplant autumn sage without damaging roots?
Carefully dig around autumn sage, maintaining at least 6 inches (15 cm) from the stem to avoid harming the roots. Gently lift and move the plant.
How deep should I plant autumn sage during transplant?
Autumn sage should be planted at the same depth it was in its original location. Planting it too deeply could lead to stem rot.
Should I prune autumn sage before transplanting?
Yes, pruning autumn sage before transplanting is beneficial. It reduces shock and helps the plant establish faster in its new spot.
Do I need to fertilize autumn sage immediately after transplanting?
Wait 2-3 weeks before fertilizing; allow autumn sage to settle in first. Then, use a slow-release, balanced fertilizer to promote healthier growth.
How to water autumn sage right after transplanting?
Water autumn sage thoroughly immediately after transplanting, but avoid overwatering. Ensure the soil is moist but not soggy to prevent root rot.
What happens if I transplant autumn sage later than mid-spring?
If you transplant autumn sage later than mid-spring, it may experience increased stress and slower growth due to hotter summer conditions. It's not ideal but can be managed.


