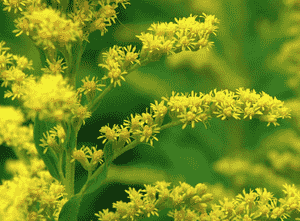
How to Transplant Canada goldenrod?
The most favorable period for relocating canada goldenrod is during the onset of spring. Choose locations that receive ample sunlight and possess soil with good drainage. Gradually introduce the plant to its new surroundings to avoid stress, facilitating a smooth adjustment.
What Preparations are Needed Before Transplanting Canada Goldenrod?
What is the Ideal Time for Transplanting Canada Goldenrod?
The optimal period for relocating canada goldenrod is when winter's chill recedes. This is a time of natural awakening, making it an opportune moment for transplantation. By placing canada goldenrod into new soil during this reawakening phase, you enable it to establish roots in harmony with natural growth cycles. This timing typically results in vigorous growth and an excellent beginning for canada goldenrod's subsequent years.
How Much Space Should You Leave Between Canada Goldenrod Plants?
For canada goldenrod, you'll want to provide each plant ample room to thrive and develop. Aim to position each transplant approximately 1 to 2 feet (30 to 60 cm) apart. This spacing helps ensure robust growth.
What is the Best Soil Mix for Canada Goldenrod Transplanting?
A fertile, well-draining soil is essential for canada goldenrod! To prepare, mix compost or a balanced organic fertilizer into the top 6 to 8 inches (15 to 20 cm) of your garden soil. This will supply canada goldenrod with the necessary nutrients.
Where Should You Relocate Your Canada Goldenrod?
Sunlight is crucial for canada goldenrod. Therefore, select a transplanting site that receives full sun, meaning it's exposed to sunlight for at least 6 to 8 hours daily. A bit of afternoon shade could help canada goldenrod thrive even better.
What Equipments Should You Prepare Before Transplantation Canada Goldenrod?
Trowel
Useful for excavating holes in the soil to position your canada goldenrod.
Gardening Gloves
To safeguard your hands while handling the soil and plant material.
Garden cart or wheelbarrow
For moving the canada goldenrod from its original spot to its new location.
Watering can
Crucial for hydrating the canada goldenrod both before and after its relocation.
Root pruning shear
To trim roots if they have become excessively long.
Mulch
To maintain soil moisture around the canada goldenrod post-transplant and to suppress weed growth.
How Do You Remove Canada Goldenrod from the Soil?
How Do You Remove Canada Goldenrod from the Soil?
From Ground: First, moisten the canada goldenrod plant to dampen the soil. Then, dig approximately 6-8 inches away from the plant's base using your trowel or spade, ensuring the plant's root ball remains intact. Proceed slowly around the plant, deepening the excavation as you go. Once you've dug sufficiently deep and wide, carefully work the trowel or spade beneath the root ball to lift the plant from its initial position. Keep as much of the root ball undisturbed as possible.From Pot: Water the plant thoroughly before attempting to transplant it. Turn the pot on its side and hold the plant steady by its stems. Tap the pot's rim on a firm surface, allowing the plant and root ball to slide out. If the plant is stuck, you may need to cut the pot away.From Seedling Tray: Water the tray prior to transplanting. Push up from the tray's bottom to extract the canada goldenrod plant. Hold it by its leaves, rather than its stems, to prevent damage. Allow as much of the original soil to remain attached to the roots as possible.
Step-by-Step Guide for Transplanting Canada Goldenrod
Digging the hole
Excavate a hole that is twice the width of the root ball and deep enough so that when placed inside, the root ball is level with or slightly below the surrounding ground surface.
Test fitting the canada goldenrod
Prior to planting, position the canada goldenrod into the hole to confirm it fits. The top of the root ball should be flush with or slightly beneath the ground level.
Placing the canada goldenrod
Carefully set the canada goldenrod into the hole, taking care not to harm the root ball. The canada goldenrod should stand upright.
Backfilling
Gradually refill the hole around the canada goldenrod with the excavated soil, gently firming it as you proceed.
Watering
Provide your plant with a thorough watering immediately after transplanting to settle the soil.
How Do You Care For Canada Goldenrod After Transplanting?
Watering
Ensure to water the canada goldenrod regularly following the transplant to aid its establishment. The soil should remain consistently moist, but not excessively wet.
Mulching
Apply a layer of mulch to help retain moisture and inhibit weed growth.
Staking
If your canada goldenrod is tall, you might need to stake it to offer support and encourage upright growth.
Monitoring
Observe your canada goldenrod for any indications of transplant shock, such as wilting, yellowing foliage, or stunted growth.
Troubleshooting Common Issues with Canada Goldenrod Transplantation.
What's the best time to transplant canada goldenrod?
Relocate canada goldenrod during the transitional periods. Early spring or early autumn are optimal. These are also known as season 1 (S1) and season 2 (S2).
Does transplanting canada goldenrod require a specific spacing?
Absolutely! For canada goldenrod, maintain a separation of 1-2 feet (30-60 cm). This distance allows the plant to grow without competing for sunlight or nutrients.
How much should I water canada goldenrod after transplanting?
Water canada goldenrod generously immediately after transplanting. This helps to settle the soil around the roots. Adjust subsequent watering based on weather, but keep the soil consistently moist.
What kind of soil does canada goldenrod prefer for transplant?
Canada goldenrod thrives in a wide variety of soils. However, it favors well-drained soil rich in organic matter. Ensure the new location meets these requirements.
How deep should the hole be when transplanting canada goldenrod?
The hole should be twice the diameter and the same depth as the root ball. This is approximately 10 inches (25 cm) but can vary depending on the plant's size.
I've heard about 'hardening off' when transplanting. Does it apply to canada goldenrod?
Yes, 'hardening off' canada goldenrod before transplanting is essential. Gradually expose the plant to outdoor conditions over a week to enhance its survival rate after relocation.
How soon will canada goldenrod start to grow after being transplanted?
Typically, canada goldenrod begins to exhibit new growth within 2-3 weeks post-transplant. Be patient and provide consistent care to ensure a successful transplantation.
Does canada goldenrod need fertilizer after transplantation?
Yes, providing canada goldenrod with a slow-release fertilizer after transplanting is beneficial. Fertilizers will replenish soil nutrients and facilitate the plant's establishment.
What should I do if canada goldenrod wilts after transplanting?
It's normal for canada goldenrod to show slight wilting after transplanting due to transplant shock. Keep the soil moist, offer shade, and the plant should recover within a few days.
What if the leaves of canada goldenrod turn yellow post-transplant?
Yellow leaves can indicate overwatering or a nutrient deficiency. Ensure the plant is not waterlogged and consider a balanced slow-release fertilizer to restore its vitality.


