How to Transplant Mountain hemlock?
Mountain hemlock establishes most effectively during the spring, benefiting from moderate temperatures and moist earth. Providing a cool, shaded spot replicates its natural alpine environment, and a generous layer of mulch after transplanting can facilitate its adaptation.
What Preparations are Needed Before Transplanting Mountain Hemlock?
What is the Ideal Time for Transplanting Mountain Hemlock?
The optimal period to relocate mountain hemlock is during the spring season. This time of renewed growth allows mountain hemlock to establish its root system before the intensity of summer. Moving mountain hemlock in the mild warmth of spring provides it with the benefit of longer, cooler days to settle in with minimal stress. Introducing mountain hemlock to the garden during this season ensures successful establishment, aligning with nature's growth cycle. Consider spring the perfect window for transplanting; it's when mountain hemlock can best synchronize with its environment, paving the way for robust development.
How Much Space Should You Leave Between Mountain Hemlock Plants?
Allow ample room for your mountain hemlock to develop. Ideally, maintain a separation of 15-20 feet (4.5-6 meters) between each specimen. This provides them with space to expand and flourish, guaranteeing a healthy plant in the future.
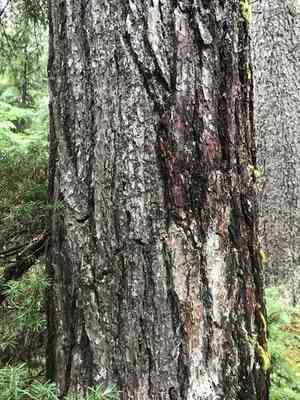
What is the Best Soil Mix for Mountain Hemlock Transplanting?
Prepare your soil; mountain hemlock prefers damp, organic, well-draining soil. Incorporate a foundational fertilizer before transplanting to encourage root development. You can choose a general-purpose garden fertilizer, following the package directions.
Where Should You Relocate Your Mountain Hemlock?
Remember, mountain hemlock thrives in full to partial sunlight. Locate a spot with these conditions for transplanting. Bright light not only warms the soil but also supports your plant's growth. Just ensure it's not too intense to prevent scorching.
What Equipments Should You Prepare Before Transplantation Mountain Hemlock?
Gardening Gloves
To safeguard your hands while handling soil and the plant.
Trowel
For excavating and lifting small plants.
Shovel
To dig larger holes and assist with plant relocation.
Stakes and Ties
These may be necessary to support your plant after transplanting.
Pruning Shears
To aid in trimming any damaged roots or branches.
Watering Can
For hydrating your plant both before and after transplanting.
Wheelbarrow or Hand Truck
Useful for transporting larger, heavier plants.
Garden Hose
To ensure plants are thoroughly watered during the transplanting process.
How Do You Remove Mountain Hemlock from the Soil?
How Do You Remove Mountain Hemlock from the Soil?
From Ground: First, water the mountain hemlock plant to soften the earth. Then, using a trowel or shovel, begin to excavate around the plant. Ensure you dig wider and deeper than the estimated root spread to avoid damaging any roots. Once the plant is sufficiently loosened, carefully remove it along with as much of the root ball as possible.From Pot: If the mountain hemlock plant is in a container, water it a few hours before transplanting. Attempt to extract the plant from its pot without pulling on the stem. Invert the pot or lay it on its side, and gently tap it until the plant slides out. If the plant is severely root-bound, you might need to tap the rim on a firm surface or carefully cut the pot away.From Seedling Tray: If the mountain hemlock plant is starting in a seedling tray, be aware that they are delicate. Water the tray thoroughly before transplanting. Very gently, use a spoon or small tool to lift the plantlet out, taking care not to harm the young roots. Hold the plant by its leaves rather than its stem to prevent injury.
Step-by-Step Guide for Transplanting Mountain Hemlock
Preparation
Prepare your transplant hole before extracting the mountain hemlock from its current spot. The hole should be deep and wide enough to accommodate the plant's root ball. Aim to match the plant's soil level in the ground. Dig a hole wider than the plant's root ball to loosen the soil and allow for new root growth.
Insertion
Lower the mountain hemlock into the hole. Be careful to keep the plant upright and ensure the top of the root ball is level with the ground surface.
Fill in
Backfill the planting hole with the original soil, pressing down gently to reduce air pockets.
Water
Once transplanted, water the mountain hemlock generously. Continue to water daily for the initial week, then gradually decrease the frequency.
Support
If necessary, use garden stakes and ties to support your transplanted mountain hemlock.
How Do You Care For Mountain Hemlock After Transplanting?
Watering
Keep the soil around the mountain hemlock consistently moist, but not saturated, for the first few weeks post-transplant to encourage strong roots.
Pruning
After the mountain hemlock has been transplanted, it will require some pruning to help it recover from any damage sustained during the transplant process.
Avoid fertilizing
It's generally advisable to refrain from fertilizing transplanted trees and shrubs for at least a year. New plants often struggle to absorb nutrients until they become more established.
Monitor
Observe your mountain hemlock daily for the first week or two to ensure it is adapting to its new environment. Remember it's better to water deeply and less often than a little bit every day.
Troubleshooting Common Issues with Mountain Hemlock Transplantation.
When is the ideal time to transplant mountain hemlock?
The perfect time to transplant mountain hemlock is during the early or late stages of the growing season. Preferably during the first to third quarters of the season.
How much distance should be maintained between two mountain hemlock plants?
Provide each mountain hemlock with approximately 15-20 feet (4.5-6 meters) of space. This helps prevent competition for water and nutrients and avoids potential disease spread.
How to prepare the soil before planting mountain hemlock?
The soil should be well-draining and rich in organic matter. If needed, amend with compost or organic humus. Ensuring a pH between 5.0 and 6.0 will promote mountain hemlock's health.
What should I do if the leaves of mountain hemlock turn yellow after transplanting?
Yellow leaves may indicate a watering issue or nutrient deficiency. Ensure you're watering correctly, not too much or too little, and consider using a balanced, slow-release fertilizer.
How much should I water mountain hemlock after transplanting?
Water mountain hemlock thoroughly after transplanting, and continue to water regularly, keeping the soil moist but not waterlogged. Always check the top inch (2.5 cm) of soil before watering.
My mountain hemlock isnât growing after transplantation, what should I do?
Don't panic. Mountain hemlock may be experiencing transplant shock, common in many plants post-transplantation. Keep up watering and care routines, and allow the plant time to adapt to its new environment.
How deep should I plant mountain hemlock?
Plant mountain hemlock at the same soil level as it was in the original container. Burying it too deep or too shallow can result in poor growth or even failure.
What to do if mountain hemlock looks wilted after transplantation?
Wilting could be a sign of dehydration or transplant shock. Water consistently to keep the soil moist. A layer of mulch around (not touching) the base can also help retain moisture.
How to care for mountain hemlock after transplantation?
Water mountain hemlock regularly, maintain sufficient spacing, keep the soil rich in organic matter, and use a steady-release fertilizer. Also, protect it from pests and extreme weather conditions.
Why is my mountain hemlock showing bare spots and how to deal with it?
Bare spots often result from insufficient sunlight or pest infestation. Make sure mountain hemlock gets enough light and inspect for pests. Prune the bare spots and encourage new growth.


